Overview
Because MQTT decouples the publisher and from the subscriber, client connections are always handled by a broker. As earlier mentioned AWS IoT Core can be thought of as the broker of the IoT network and as such all MQTT communication goes through it.
Once a thing has been registered and is transmitting data through a topic outlined by the “Publish data topic protocol”. Data should be flowing into the cloud system. The two predominant ways to see this data flow is through the MQTT Test Client or by querying data directly from the timestream database.
Identify incoming data through test client
The MQTT Test client allows us to not only see data but also interact with clients in the MQTT network. This is done by subscribing or publishing to MQTT topics which is outlined in their official website here.
MQTT test client
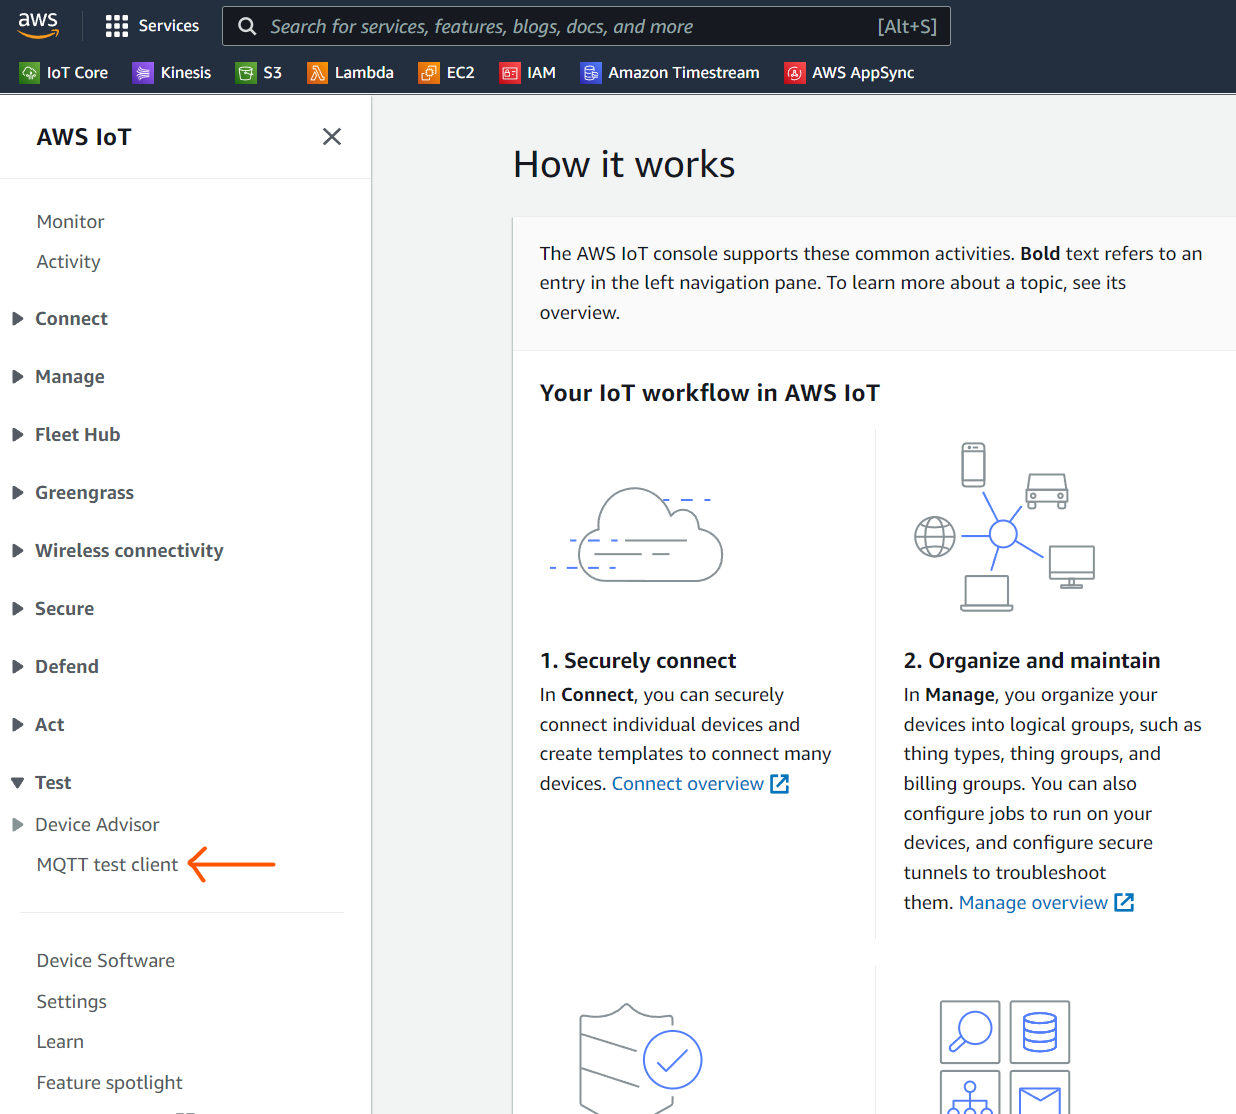
Once in the IoT Core AWS service the test client should be accesible in the side bar near the bottom.
Subscribe and Publish to topics
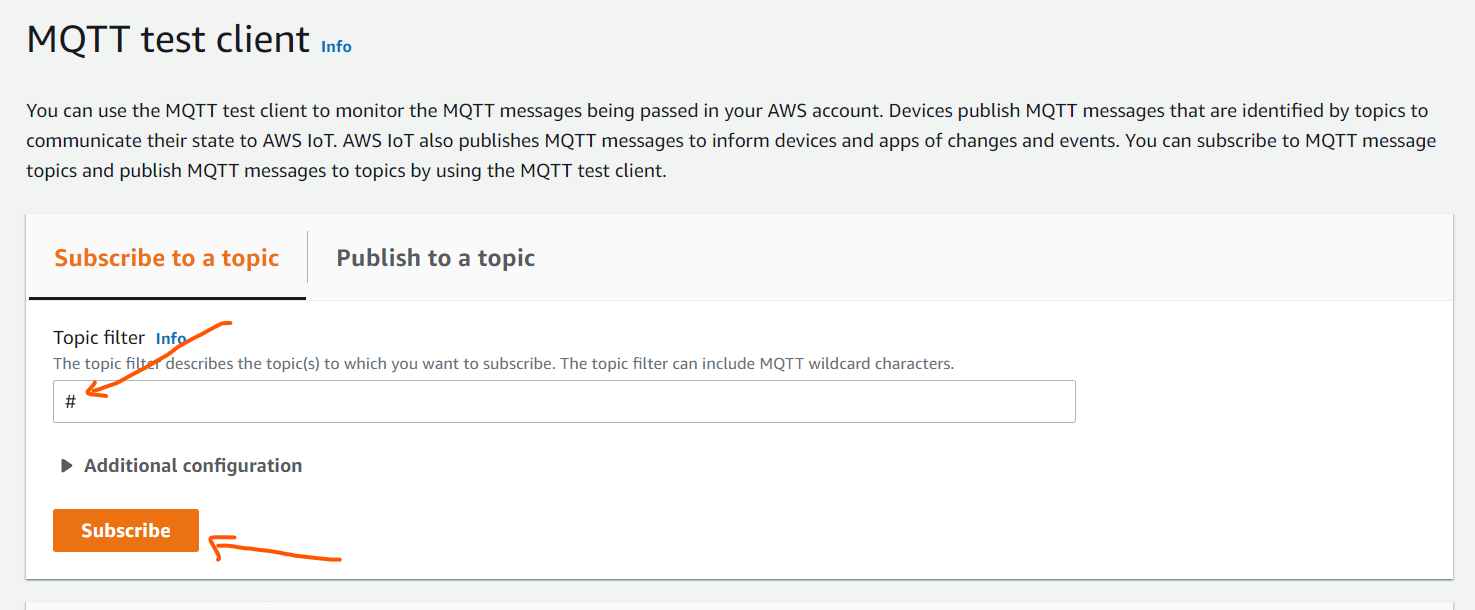
Once opened you should be able to see a top section where one can specify a topic to subscribe to or publish to. Since we want to SEE data we would need to SUBSCRIBE to the topic we would like to listen to. For testing purposes we are going to use the MQTT designated wildcard symbol by using the # (hash/sharp) symbol. This symbol allows us to subscribe to ALL topics.
View all data moving in the IoT network live
Once subscribed any MQTT messages being sent in the network will be viewable here. Assuming a Thing has been succesfully connected and is publishing the published data from the thing should be viewable by subscribing to the # (wildcard) topic.
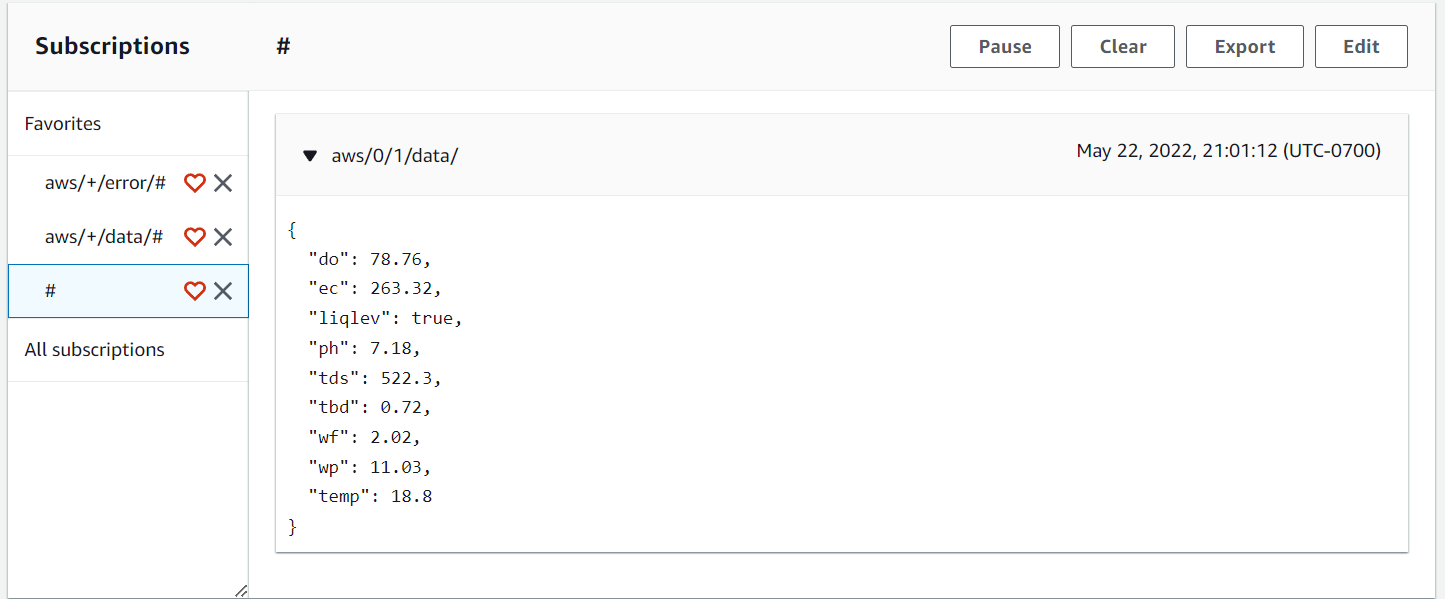
PLEASE NOTE: Data seen through the MQTT client DOES NOT mean it is being saved into a database. The MQTT client, as the name suggests, is a testing service that is very powerful as a troubleshooting tool. If data is published from a thing into the IoT network and you see it through the MQTT client as well then that proves that the Thing has been succesfully registered and is succesfully publishing data.
Query saved data in timestream
Since our current cloud architecture uses AWS Timestream as our main database it is also reasonable to view data through timestream. Of course, not every topic that is being published is saved into timestream, only data sent to the topic outlined by the “Publish data topic protocol” is saved to the database.
Navigate to timestream service and to Query Editor
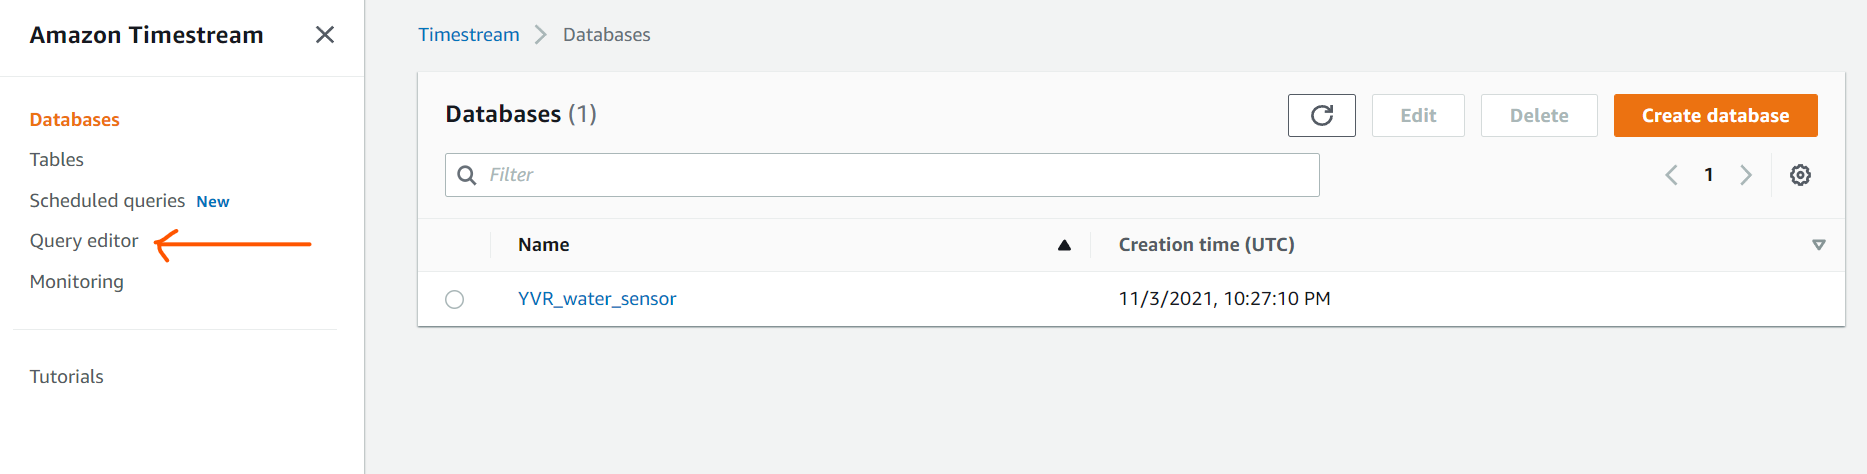
Upon landing in the AWS Timestream service dashboard the “Query Editor” service should be on the sidebar to the left.
All data sensor data being sent to the cloud is saved under the table called EMA_C22_main_data_v00. So this would be the target table to view data being sent by the buoy sensors. Right click the table and select preview data.
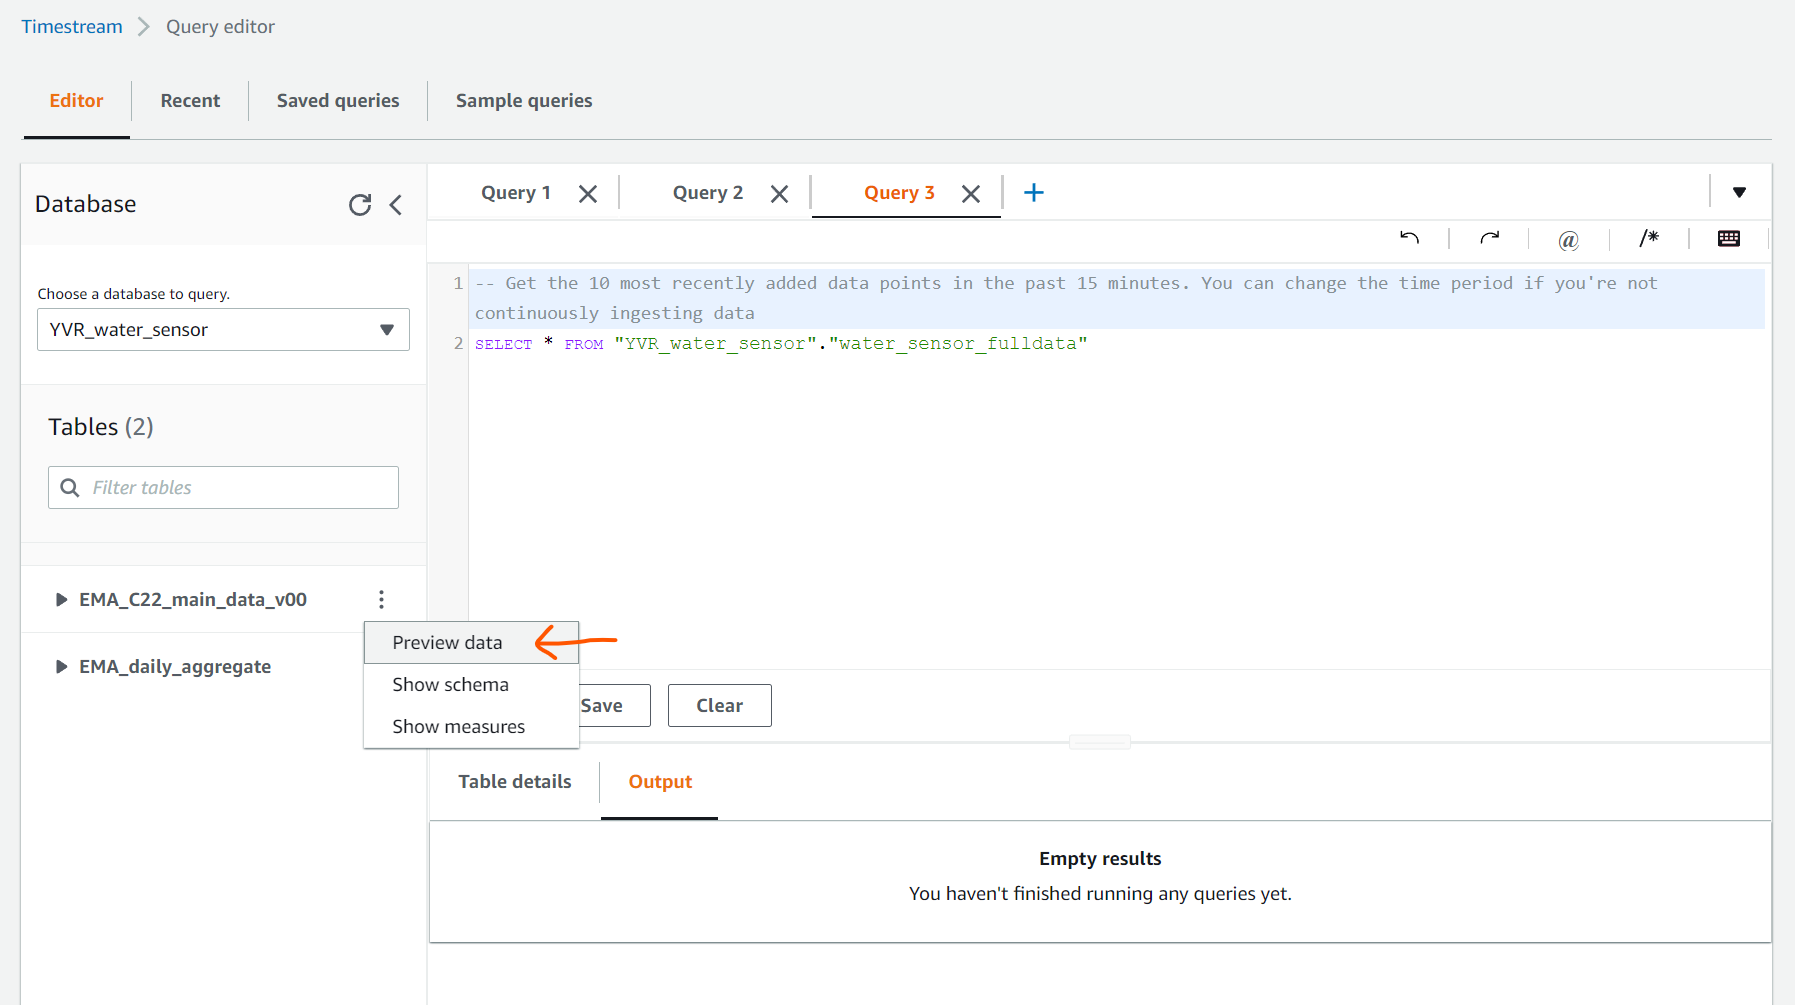
Utilize powerful query engine to query data
Timestream DB uses a powerful query engine modeled after SQL language, so it should be very comfortable for those familiar with relational databases. Feel free to edit the boilerplate SQL that was entered when clicking “Preview data”. If there is no data showing please keep in mind that the query only queries for data that has been saved in the past 15minutes and has a max limit of 10. So, if this is too restrictive feel free to adjust the SQL query (AWS docs for Query language reference).
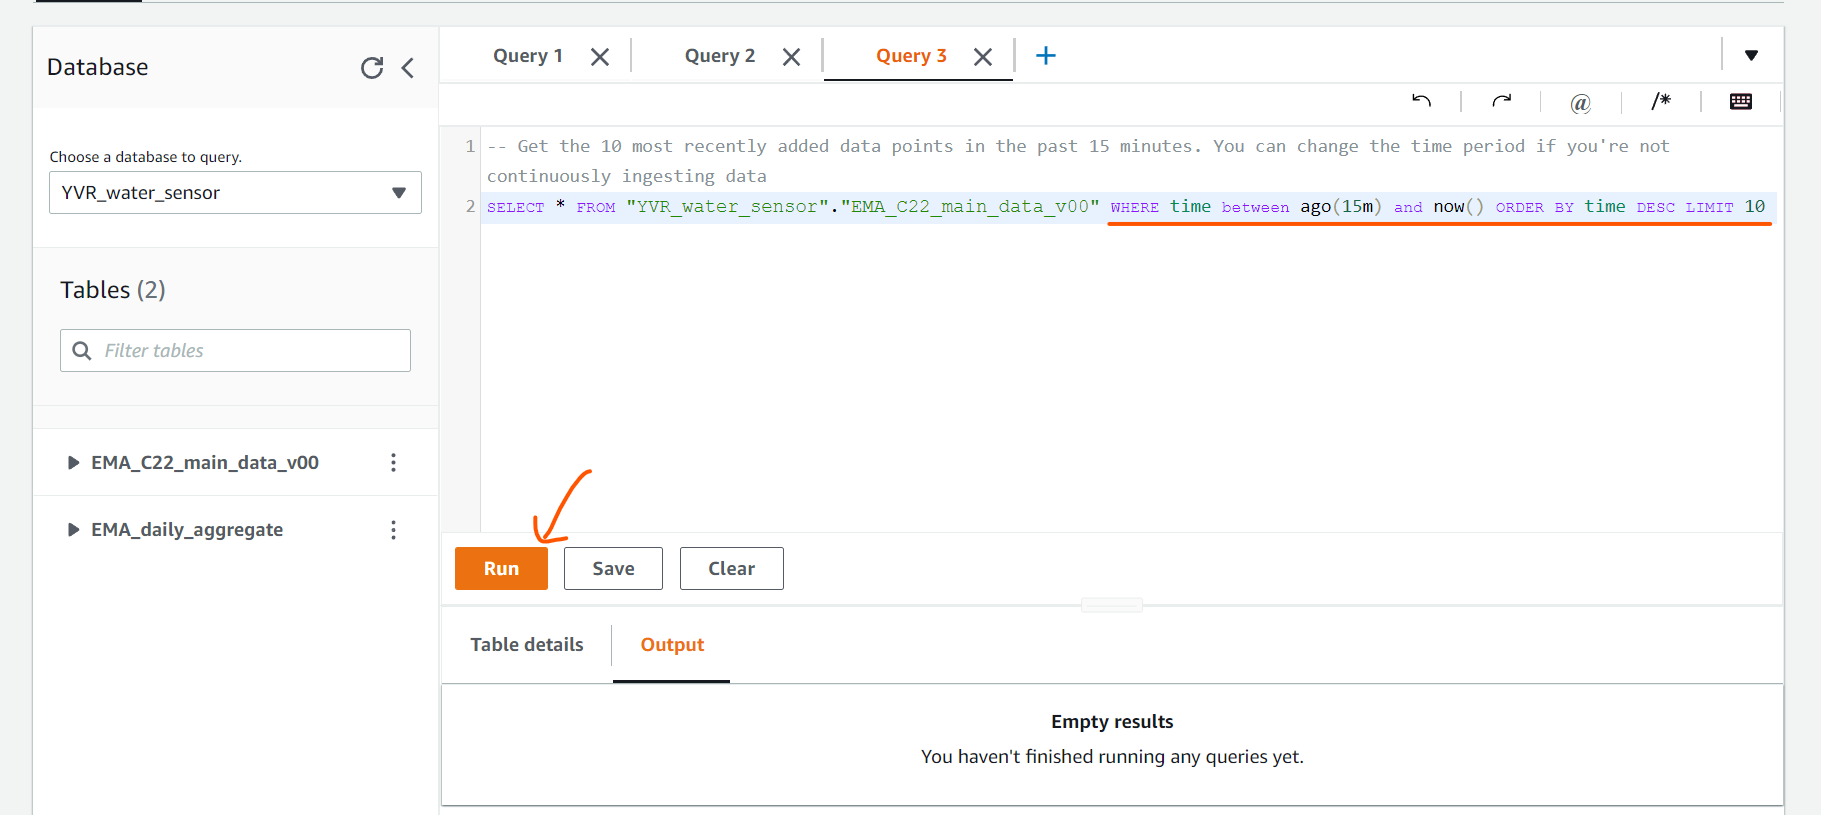
Once query has completed you will then be able to view the data below under the output tab. If you are quick enough you should be able to see the the data coming into the cloud through the MQTT test client and see that same data saved in timestream.
