Serving Data from Cloud through API gateway
Deprecated
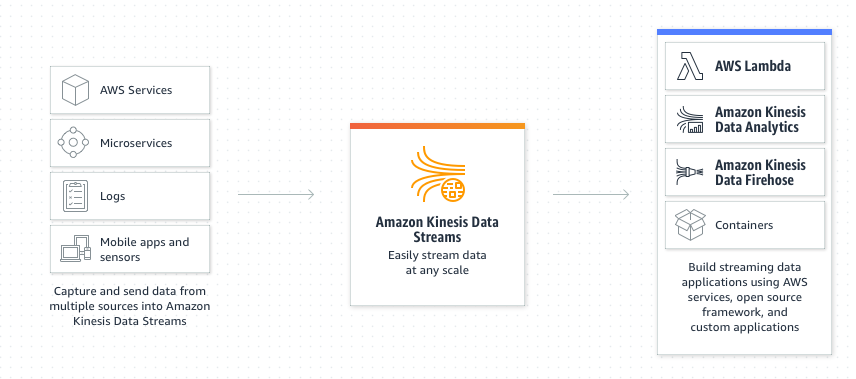
Kinesis
- TL;DR: Its a pipeline
- Uses Kinesis Producer Library
- Follows a Producer/Consumer flow
- Producers can be sensors, agents, lambda functions
- Consumers can be data lakes, lambda functions, etc
- Kinesis Data Stream vs Kinesis Firehose
-
Data stream is a singular stream of data
-
Firehose is an aggregate of data streams

-
-
Documentation Links
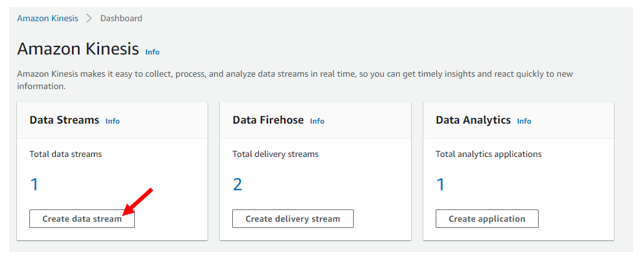
Creating Data Stream
In the AWS Console, head over to the Kinesis. You’ll be greeted with a quick dashboard/summary of existing Streams, Firehoses or Data Analytic applications. Click on the “Create Data Stream”
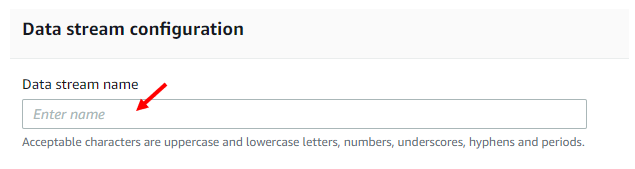
After clicking, you’ll be brought to a new page where we will be customizing the data stream. Here we can include the data stream name, data stream Capacity, and various other settings.
Naming the Data Stream
Name your data stream in the appropriate box, it should look like below:
Choosing Data Capacity
Here we can choose the data capacity. In our case, since we’re aware of our data bandwidth we can select Provisioned; However, if you’re unaware of your data usage, you can use on-demand, and then change the capacity mode afterwards to suit your needs.
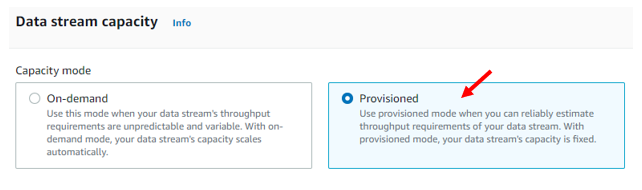
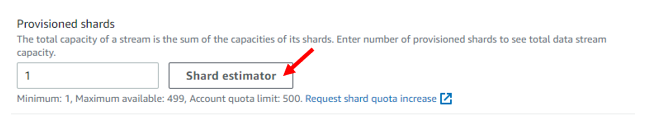
After select our capacity mode, we need to provide number of “shards” or ordered streams of data. Please be aware, each shard has a maximum write and read capacity. If you don’t care about order you can just use one shard (assuming its within the read/write capacity). If you need help deciding how many “Shards” you require, AWS provides a Shard estimator.
A important note to take into consideration: provisioned streams can be cheaper but are of fixed pricing while on-demand streams can vary dependent on usage. You can switch between the capacity modes twice every 24 hours.
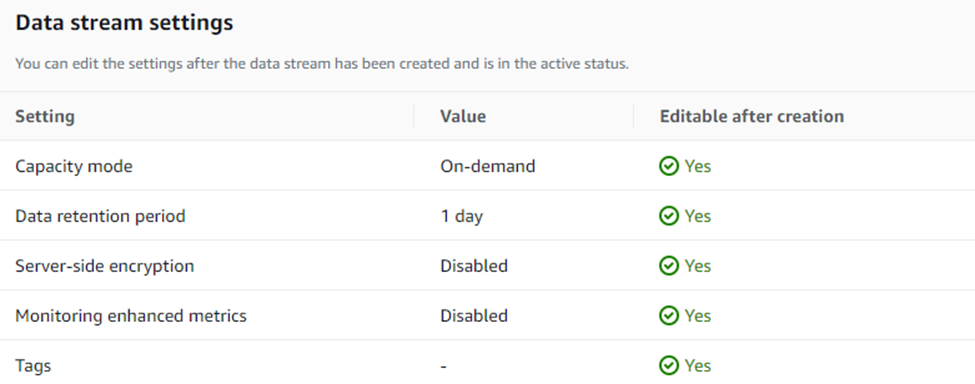
The various settings will be set by default to the following and can be edited afterwards.
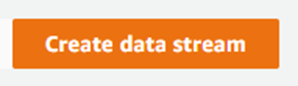
To finish creating the data stream Click on the orange “Create data stream” button
Configurations
Once the data stream is created; we’ll be brought to the data streams summary page. From here we can make configuration changes by clicking on the Configuration tab located below the Data Stream Summary.
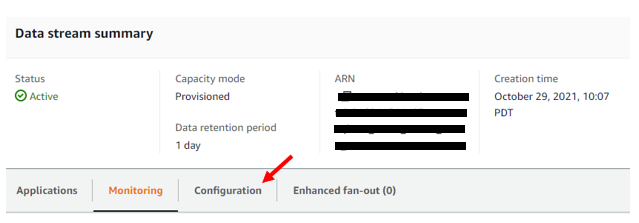
ARN is blacked out for privacy reasons.
Pricing for On-Demand (Oregon Region)

Pricing for Provisioned (Oregon Region)

Dumping Data Stream to an Endpoint
To dump data in the data stream into an endpoint or to apply a transformation to the data has to be done through “Delivery Streams” or “Data Firehose”. To access the Delivery streams menu, you can find it on the left-hand side of Amazon Kinesis or in the dashboard via the Data firehose section and clicking on the number of existing delivery streams you have; in our case, 2.
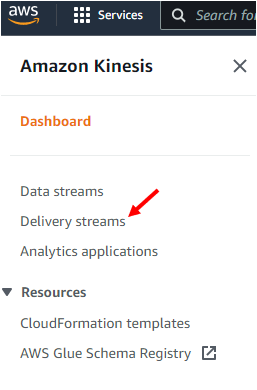
Left Navigation Menu
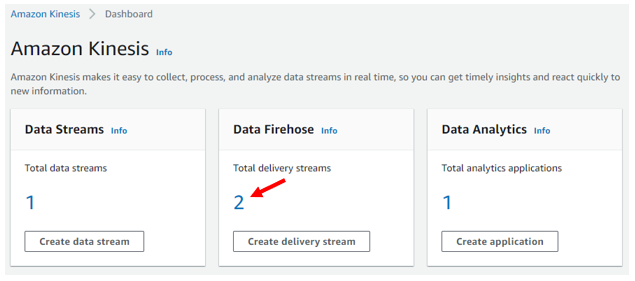
Main Amazon Kinesis Dashboard
Creating Delivery Streams
From the Delivery Stream page we can see a quick summary of existing delivery streams and create new ones.
In the delivery Stream summary page, click on the orange “Create delivery stream”

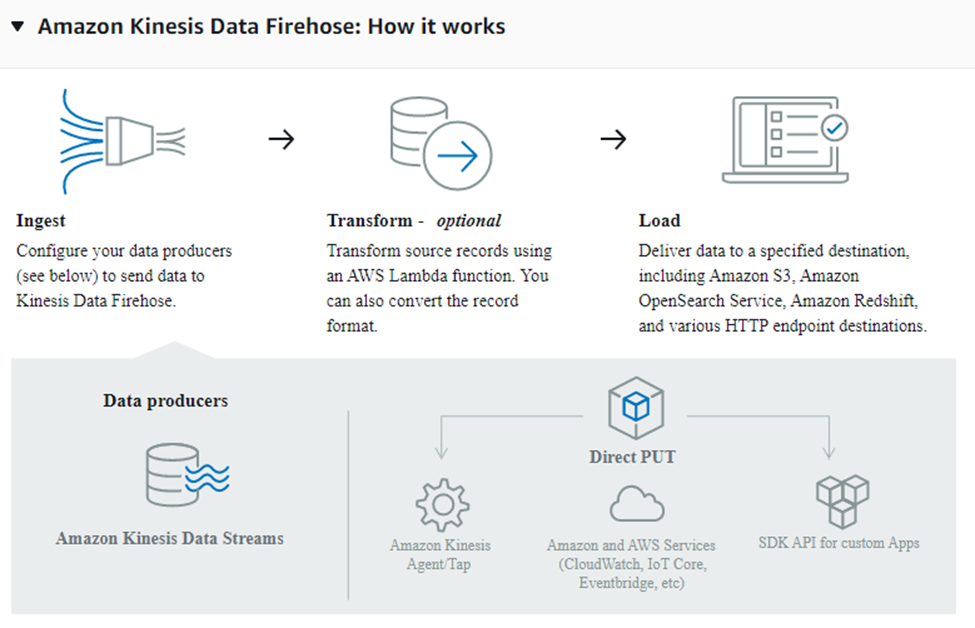
Upon entering the “Create a delivery stream page” you will be greeted with a quick infographic of how it works.
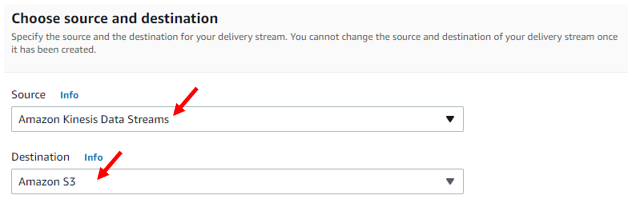
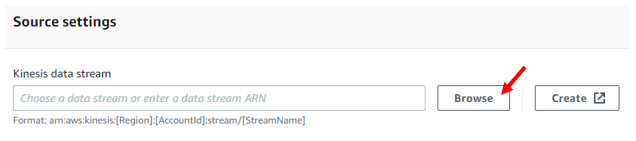
Scrolling down a little, we begin to see how to set a delivery stream up. We need to select a Source of data and a Destination for the data. In our case we want the Source to be our data stream, and our destination a S3 bucket which we can select from the drop-down menus.
New options will be unlocked below allowing us to select our data stream. We select the data stream via the browse button, or if you don’t have one set up yet you can use the create button just right of the Browse button.
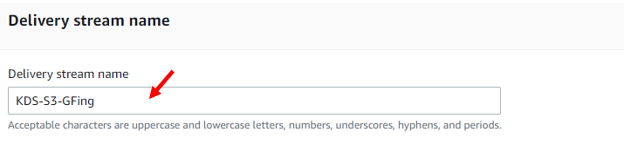
The next step (Transform and Convert Records) is optional, and is only used if you wish to transform the data via an AWS lambda function. There will be a more in-depth look into this in another section. Once we’re done selecting out data stream, we get to name our delivery stream.
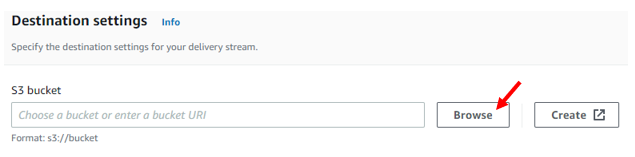
In the destination settings, we can select the S3 bucket we wish the data to flow into via the browse button. If it doesn’t exist, we can also create a new one via the create button.
Within the Destination settings, we can enable or disable Dynamic partitioning which creates targetable partitions in our data lake for specific AWS lambda functions to dump data into. This will incur more costs if enabled, and it cannot be disabled once set. For more information on costs visit: https://aws.amazon.com/kinesis/data-firehose/pricing/
In our case we are only using the S3 bucket as a storage space for raw data and transformed data (in a later section)
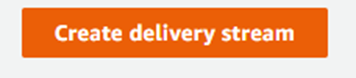
Once all you’re happy with your configurations, click on the orange “create delivery stream” button
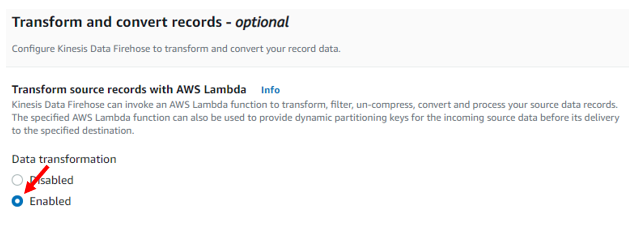
Transforming Data via the Delivery Stream
To transform data coming from the data stream before it goes to the delivery stream destination, we need to enable it in the Transform and Convert Records section mention earlier.
Once enabled, options to select our AWS Lambda function, buffer size, and buffer interval is made available.
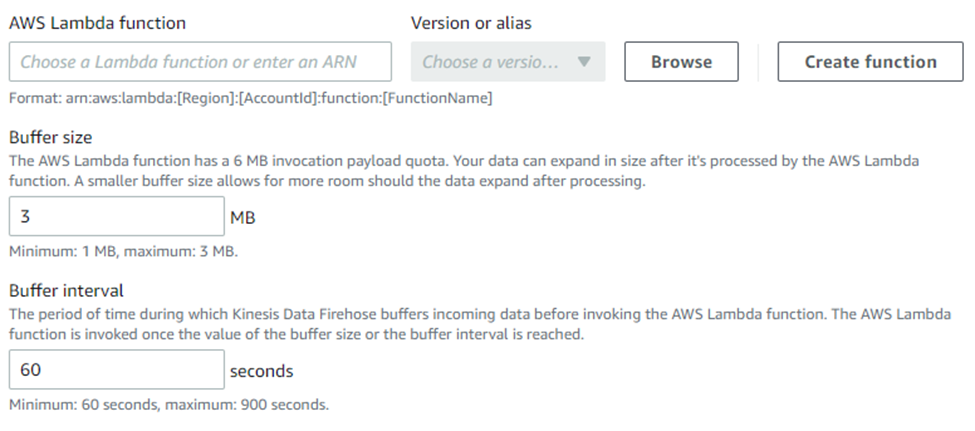
Because the data is being ran through a lambda function there is a possibility that the resulting data may take up more space than the original data, buffer size is there to accommodate the data expansion. Buffer interval is the time Kinesis Firehose buffers incoming data before invoking the lambda function. So In the screenshot above, it will buffer either 3MB of data or wait 60 seconds before invoking the lambda function. If we run into issues with data being delayed in the parsed S3 bucket, we can change the buffer size to be smaller to increase the number of times the S3 bucket will have incoming data.