Getting Data from IoT Core to Timestream
IoT Core Service
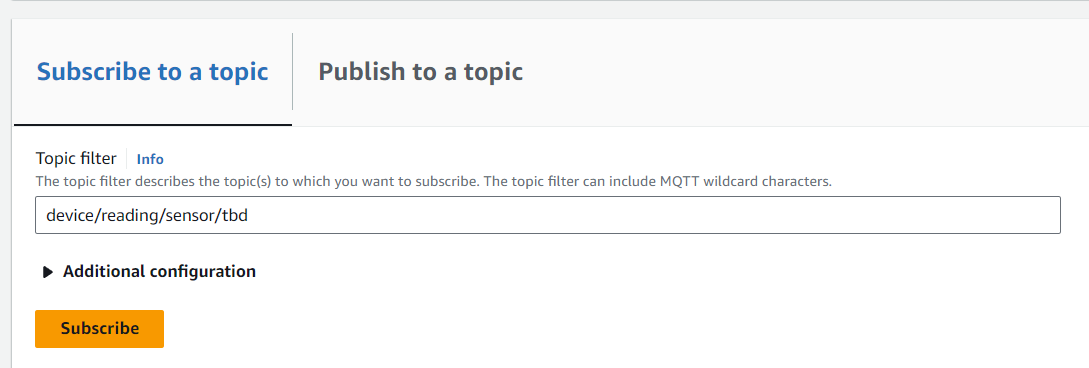
Login to AWS and search for the service AWS IoT. In order to see data flowing from device to the cloud, the user needs to subscribe to a topic. To view individual sensor value, the user needs to subscribe to each sensor topic. A screenshot below shows subscription to the Turbidity ‘tbd’ sensor.
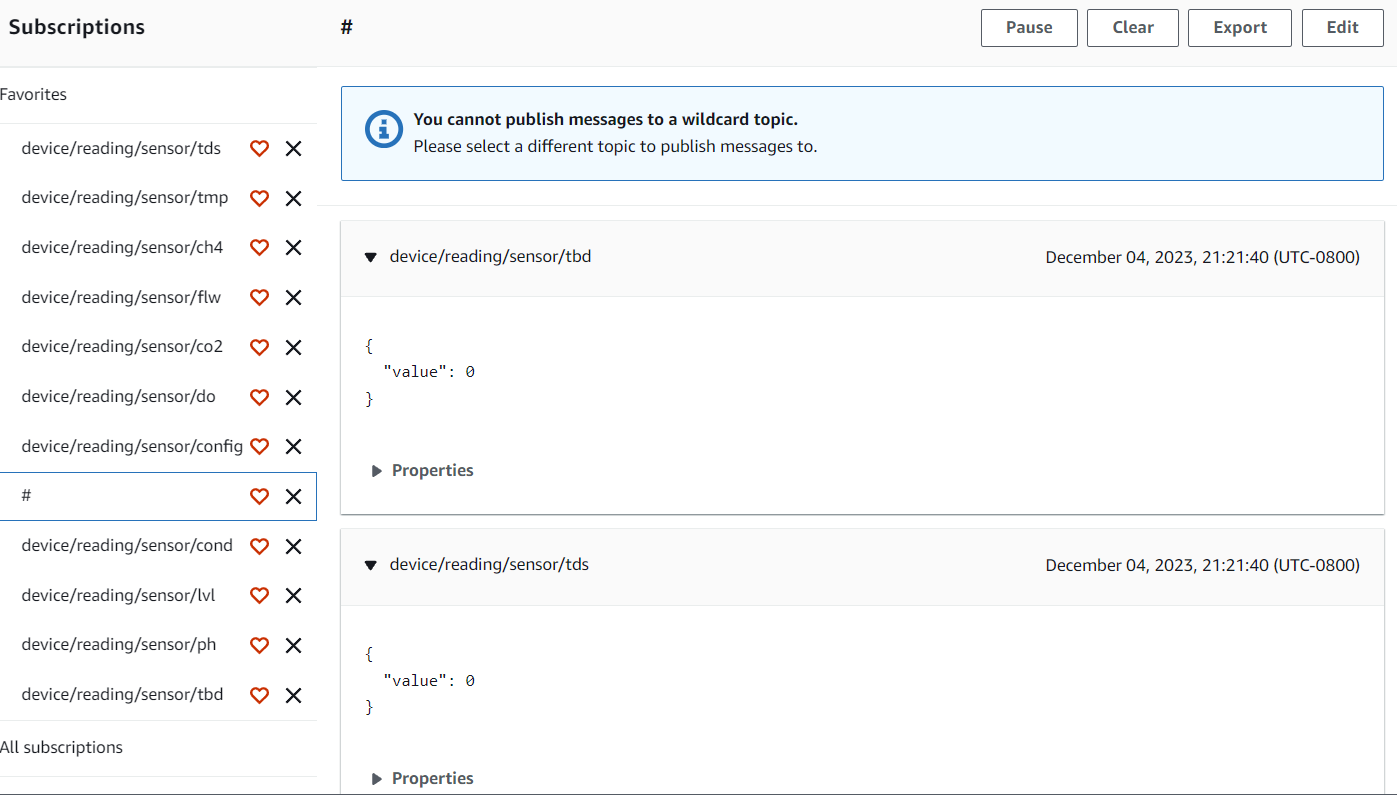
Next in order for the topics to persist after the user logs out, the user needs to add it to favourite by click on the heart picture under the section ‘All subscriptions’ then it will be in the ‘Favorites’ section. Here is the picture of all sensors as favourite. If the user wants to see all data, they will only have to select the ‘#’ topic. A screenshot below shows the left side of all favourite topics and some of values can be seen.
In order to route the information coming into IoT core, we need to setup a “message routing rule”.
Setting up an IoT Message Routing Rules
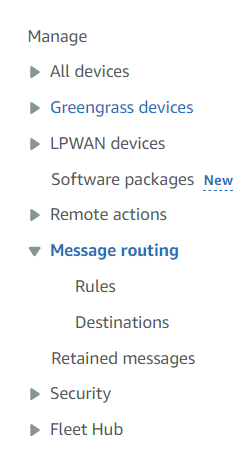
In AWS IoT Core, on the left hand navigation menu under “Manage”, scroll down to click on “Message routing” and then click on “Rules”.
This will open a new Rules page where a orange button “Create rule” on the right hand side is visible. Click on that button.

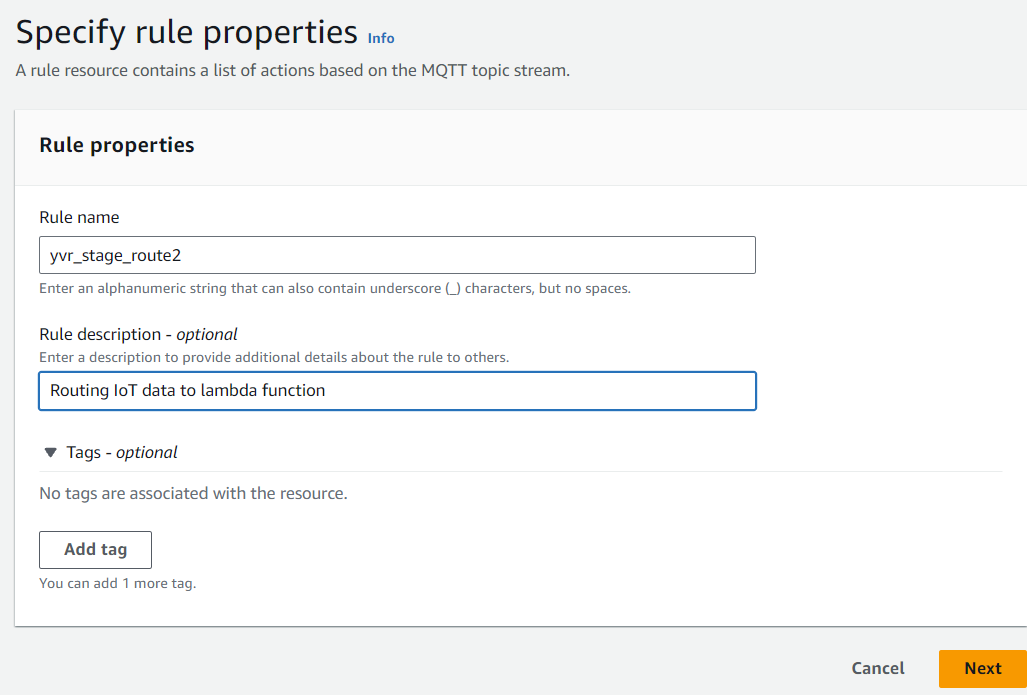
It will open a new page, where the user have to fill in the information by giving a rule name and description. Click on Next.
For step 2 update the SQL statement using the following: <SELECT , topic() as topic FROM ‘device/reading/sensor/#’>. Breaking down the SQL statement we have first we will retrun ‘’ which is just the value given by the topic. Next topic() value is equivalent to ‘device/reading/sensor/
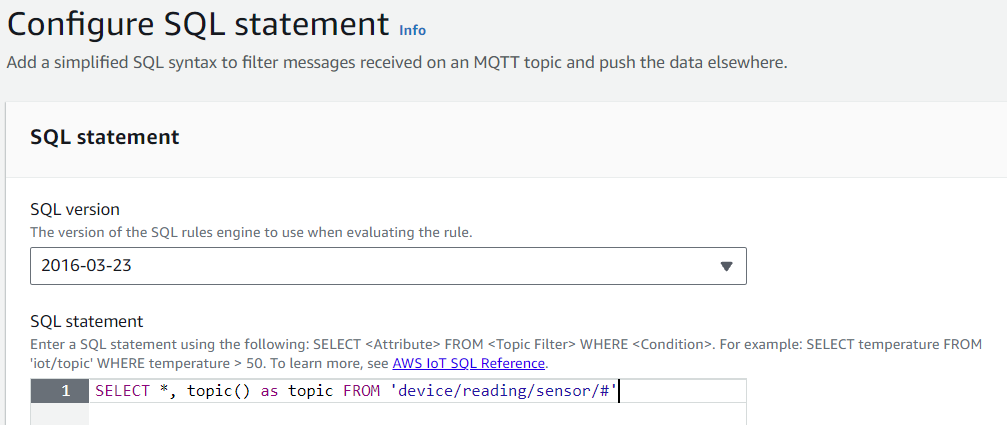
Disclaimer: We asked the device team to give us a deviceID instead just called it ‘device’ and a sensorID instead a generic abbreviation of the sensor name ‘flw’ (Water Flow sensor) but despite our push, I assume they did not have enough time to make the change.
On step 3, under the “Rule actions” section select Lambda as the action and select the lambda function. For this example I already made a lambda function but the user will click on the “Create a Lambda Function” if it does not exist. I will go more in depth about the lambda function responsiblity in the next section but the main point of this lambda function is to take the raw sensor value from the deivce, apply two calibration data point formula, and send the data to the timestream. Below is the screenshot of step 3. Click Next
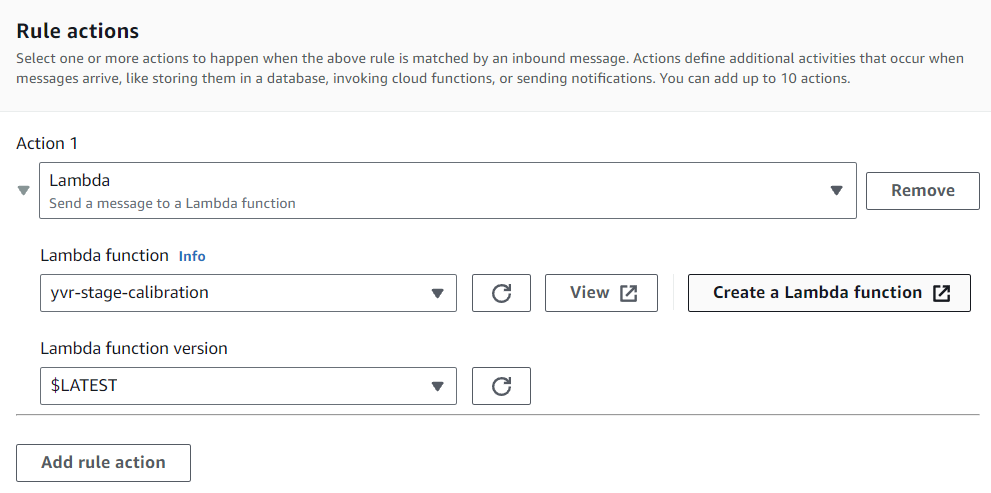
For the fourth step, click on Create button to create the Message Routing Rule.
Lambda Function
Lambda Function code is stored in GitHub: https://github.com/BCIT-Reseach-Long-Term-ISSP/cloud-2023/blob/main/src/lambda_functions/calibration.py
Lambda Function has three main responsiblity. First responsiblity is to grab the two data points in dynamodb that is used for the calibration formula. The cloud team had to mock the data for calibration as the dashboard team did not have the values for all sensors. It is also stored in the North Viginia as the other cloud team (BBY) did not migrate our data to west-2 which was agreed upon.
Below is the screenshot of item we created 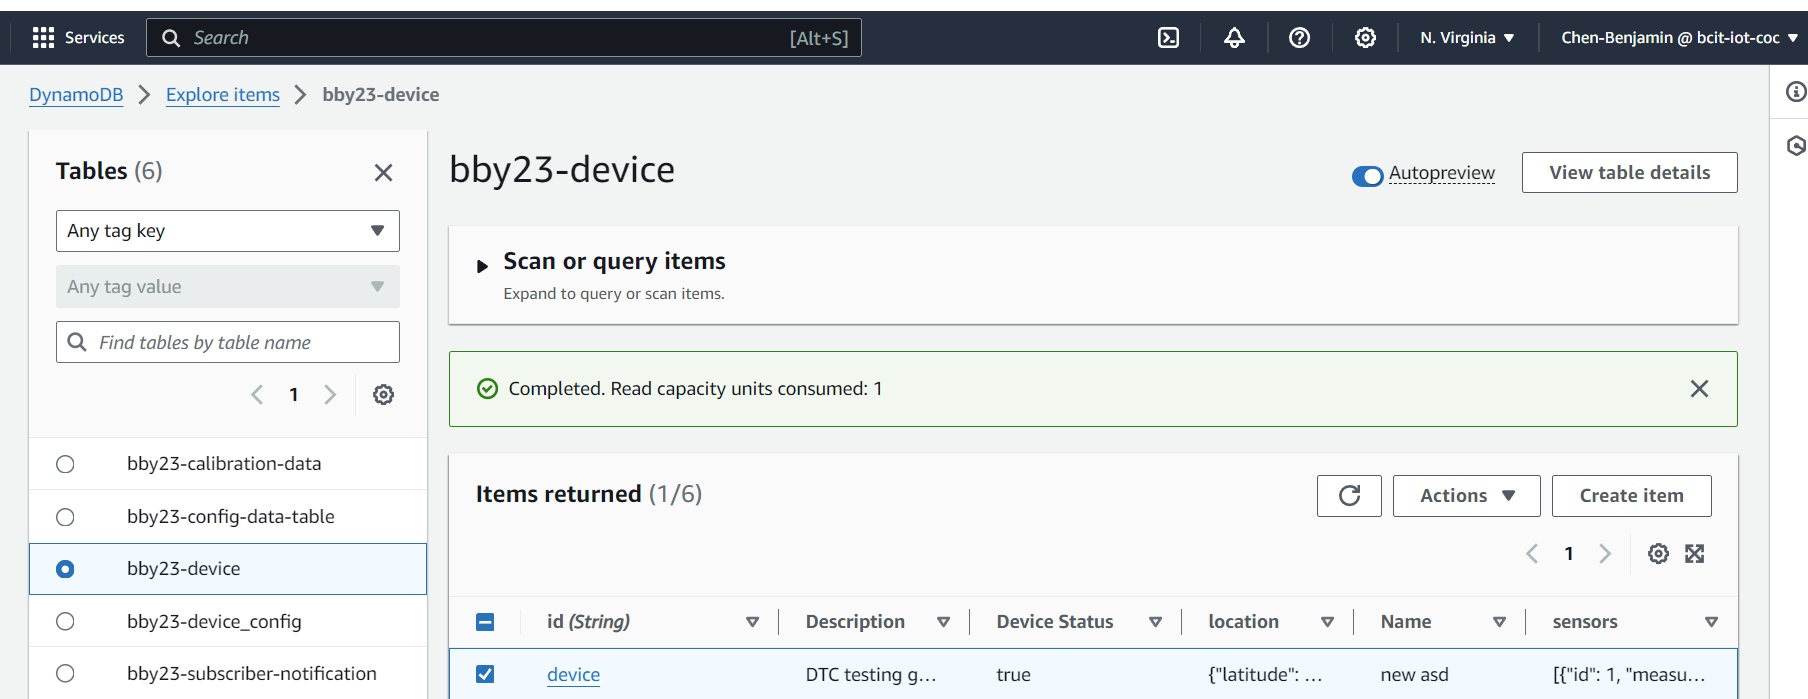
Screenshot shows the JSON view of the item data format 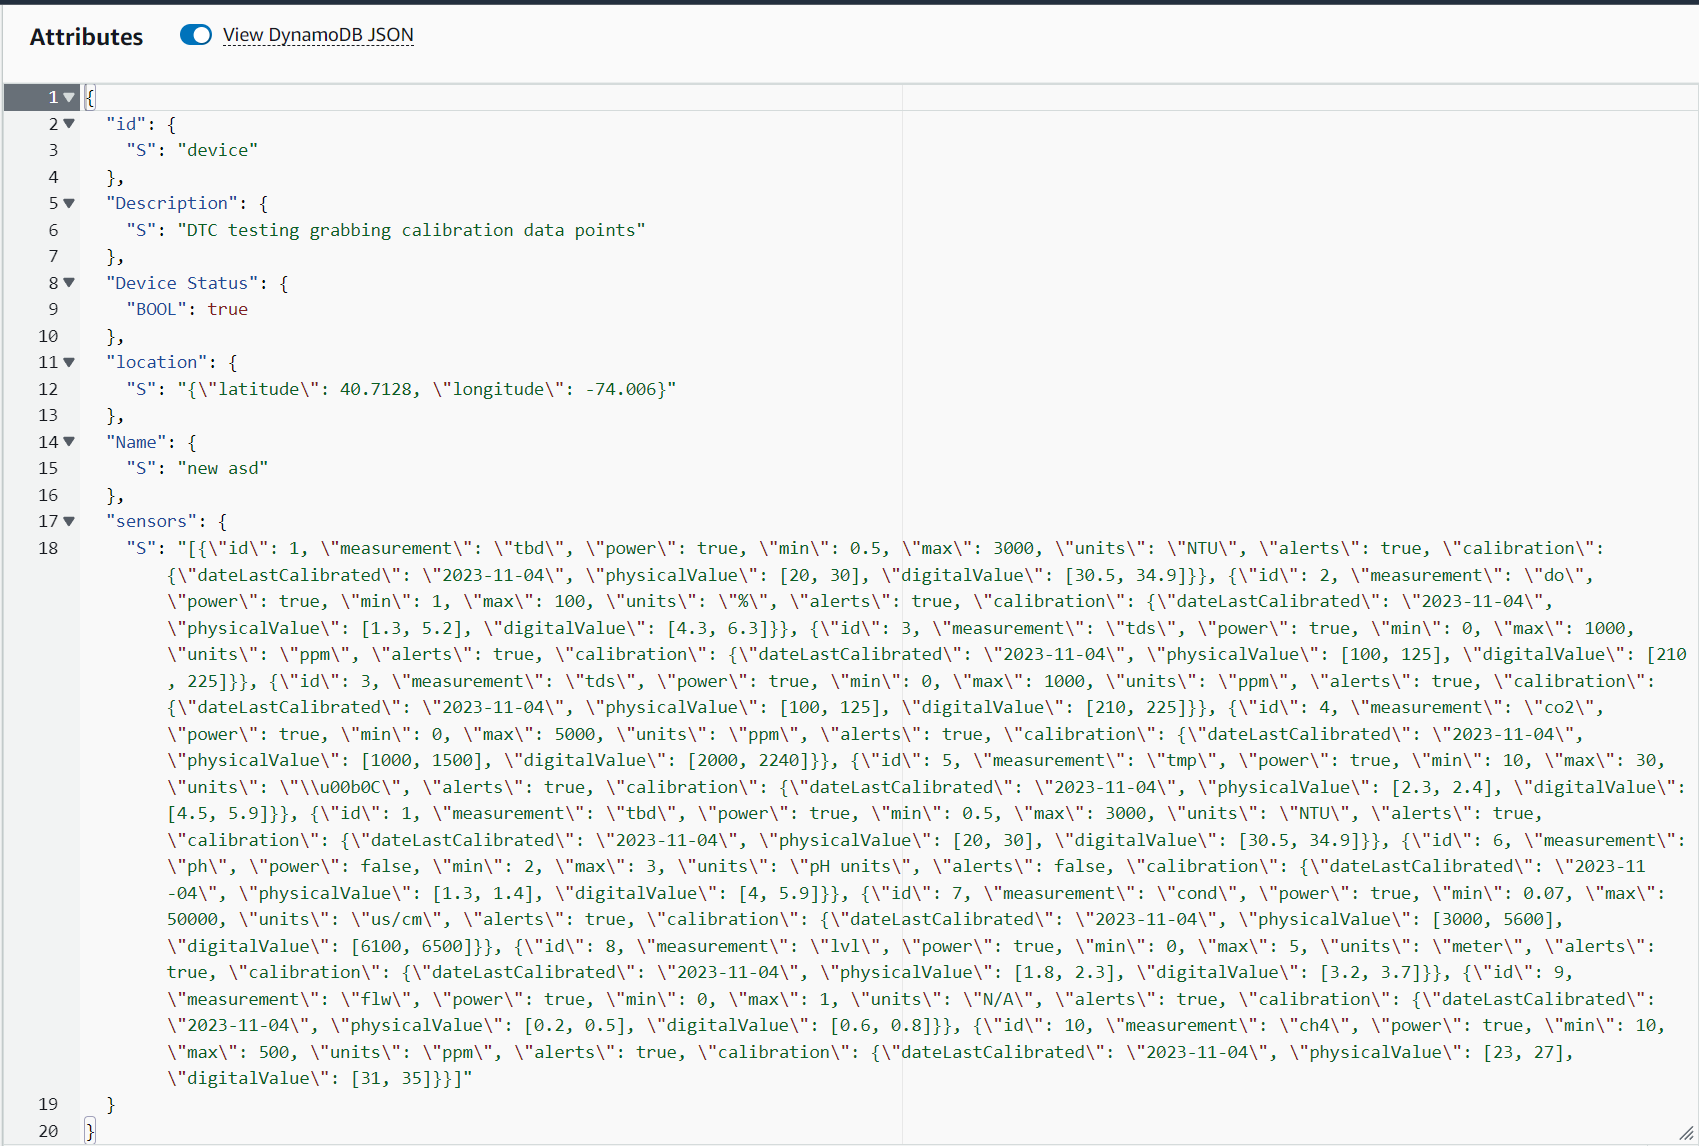
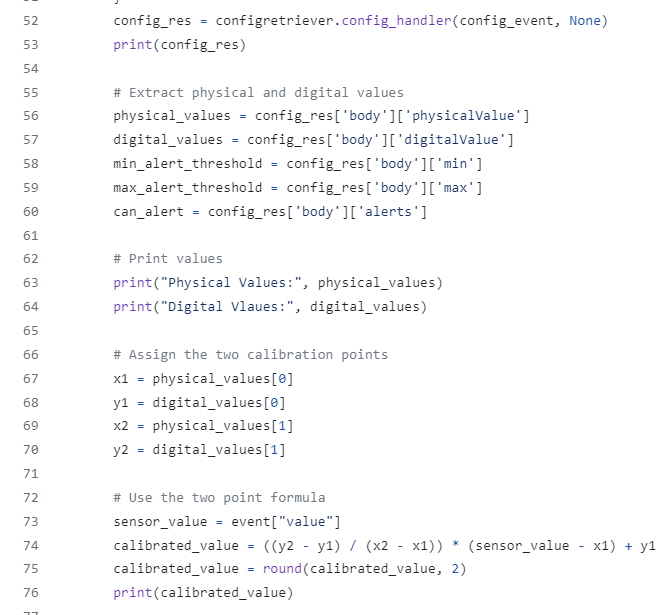
The retrival of this data is done through a lambda layer by calling the function configretriver.config_handler. The lambda layer code can be found in github also: https://github.com/BCIT-Reseach-Long-Term-ISSP/cloud-2023/blob/main/src/lambda_layers/python/configretriever.py. This function will return the json object of the following values needed for calibration formula.
It will then parse the json object returned and apply the calibration formula using two points. Below is the screenshot.
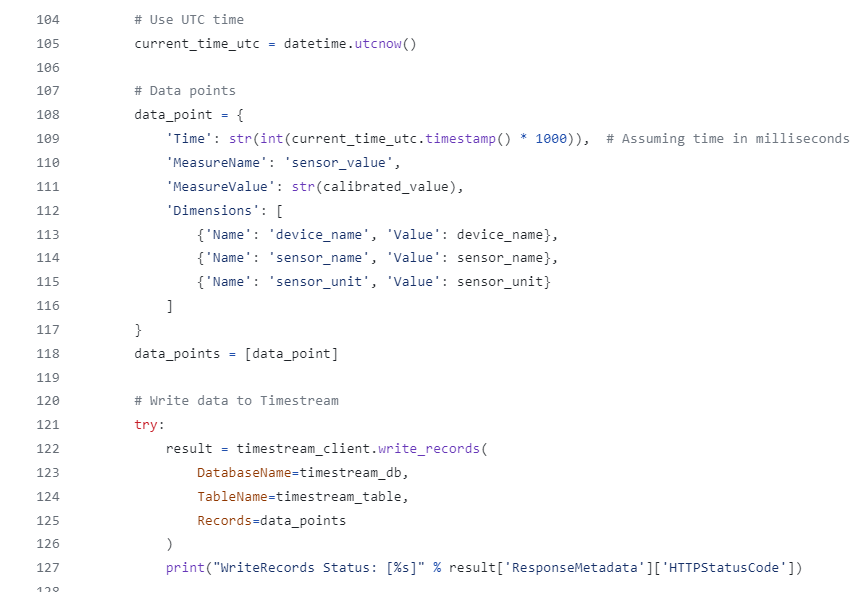
The next main responsiblity is to send the calibrated value along with other information such as “device name”, “sensor name”, and “sensor_unit” to the Timestream DB. Below is the screenshot of the code snippet.
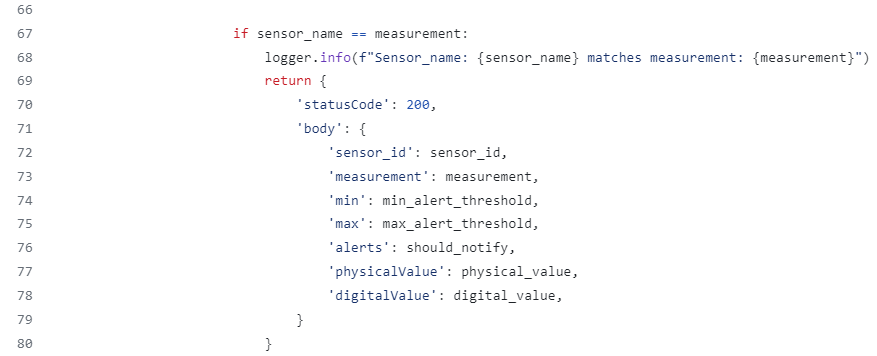
The final main responsibility is to check the calibrated data exceed either the min or max value of the sensor threshold. If it does, a user setup for email notification would be notify of the anomaly value which is used to check if there is abnormal weather pattern incoming or device needs to be check on. Below is the screenshot of the lambda function calling the ‘should_alert’ function to determine if email notication is called.
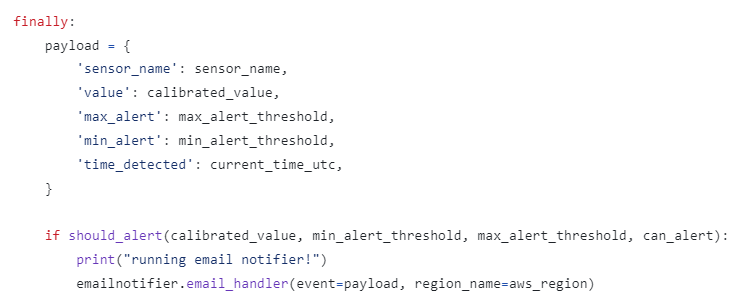
The email notification is using another lambda layer. The Github code can be found at: https://github.com/BCIT-Reseach-Long-Term-ISSP/cloud-2023/blob/main/src/lambda_layers/python/emailnotifier.py.
CloudWatch Logs
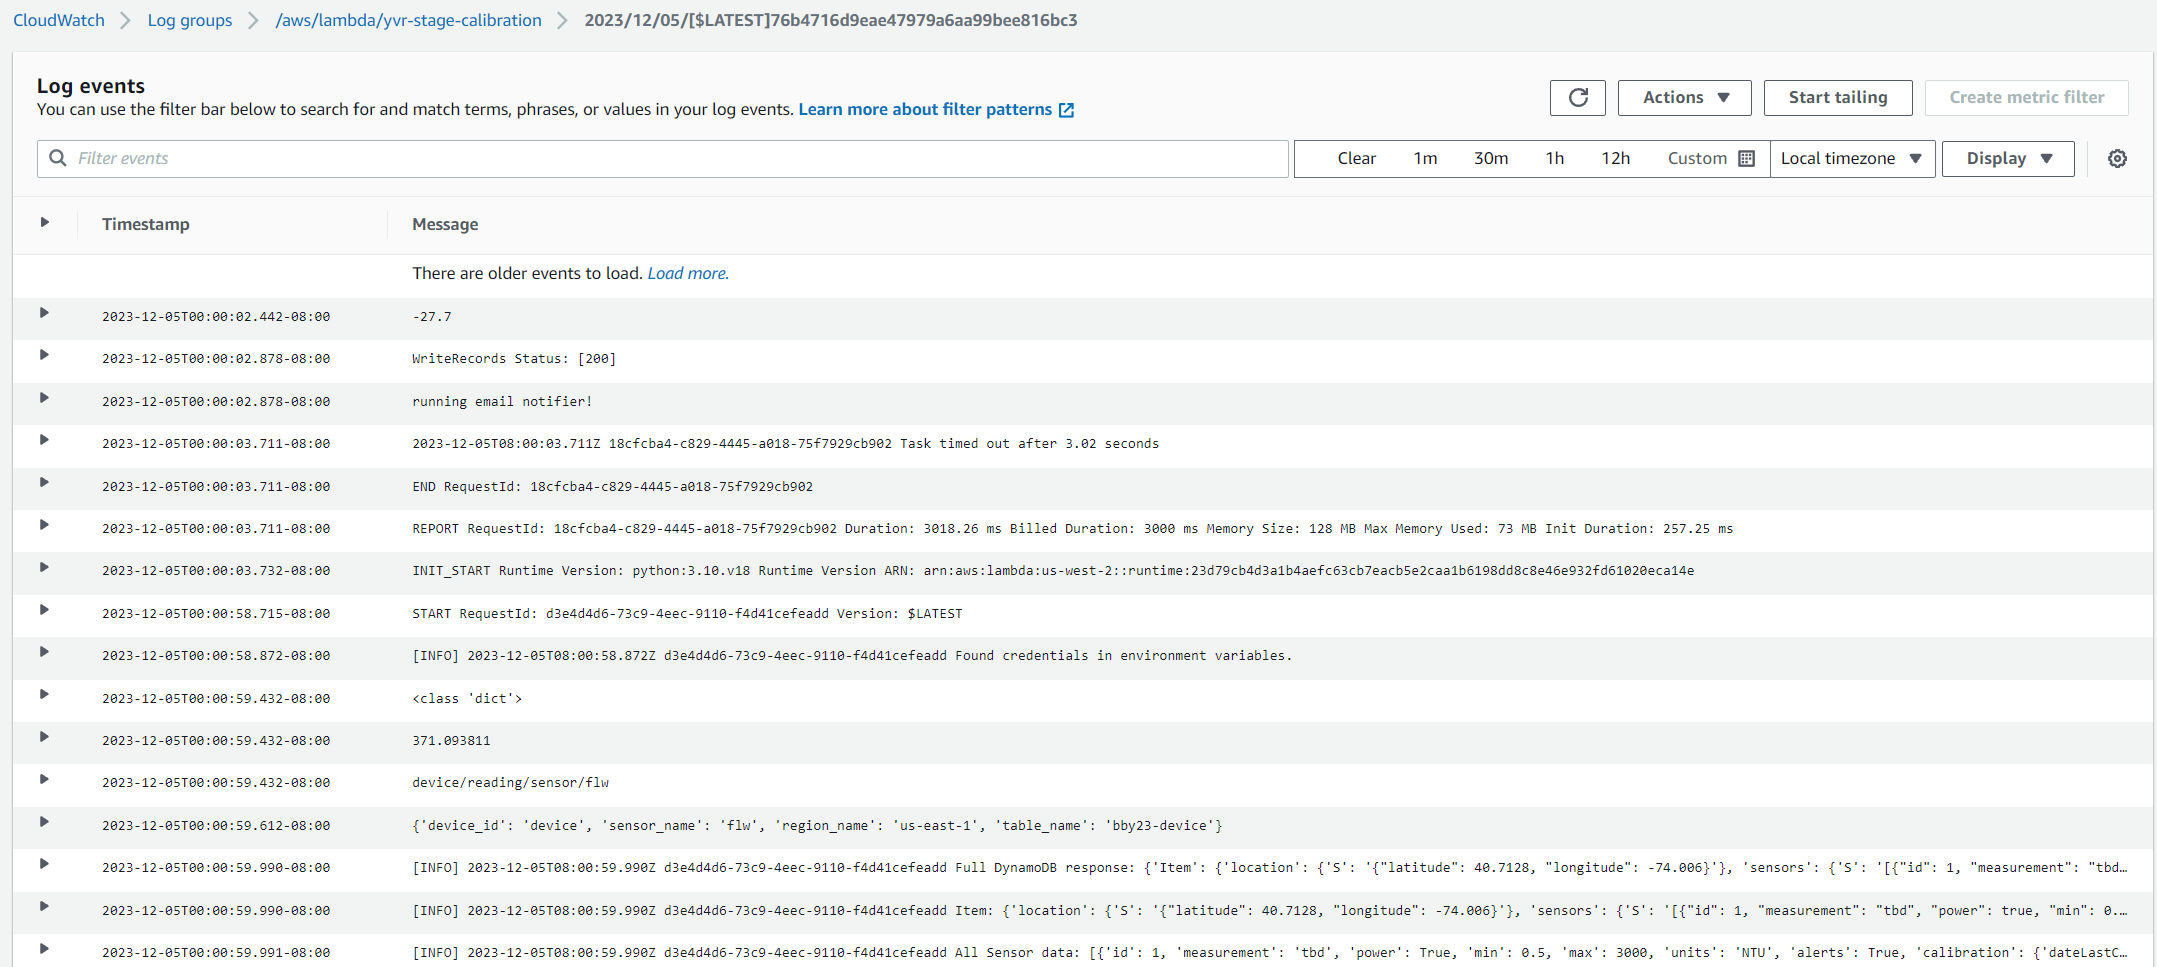
Cloud Watch logs is a good way to debug any issues found in the lamda function. There are log levels which can spot ERRORS and see any logical errors. To access it through the lambda function, click on ‘Monitor’ section and then click on ‘View CloudWatch Logs’.

Here is an example of what information is contained in these logs:
Timestream Database
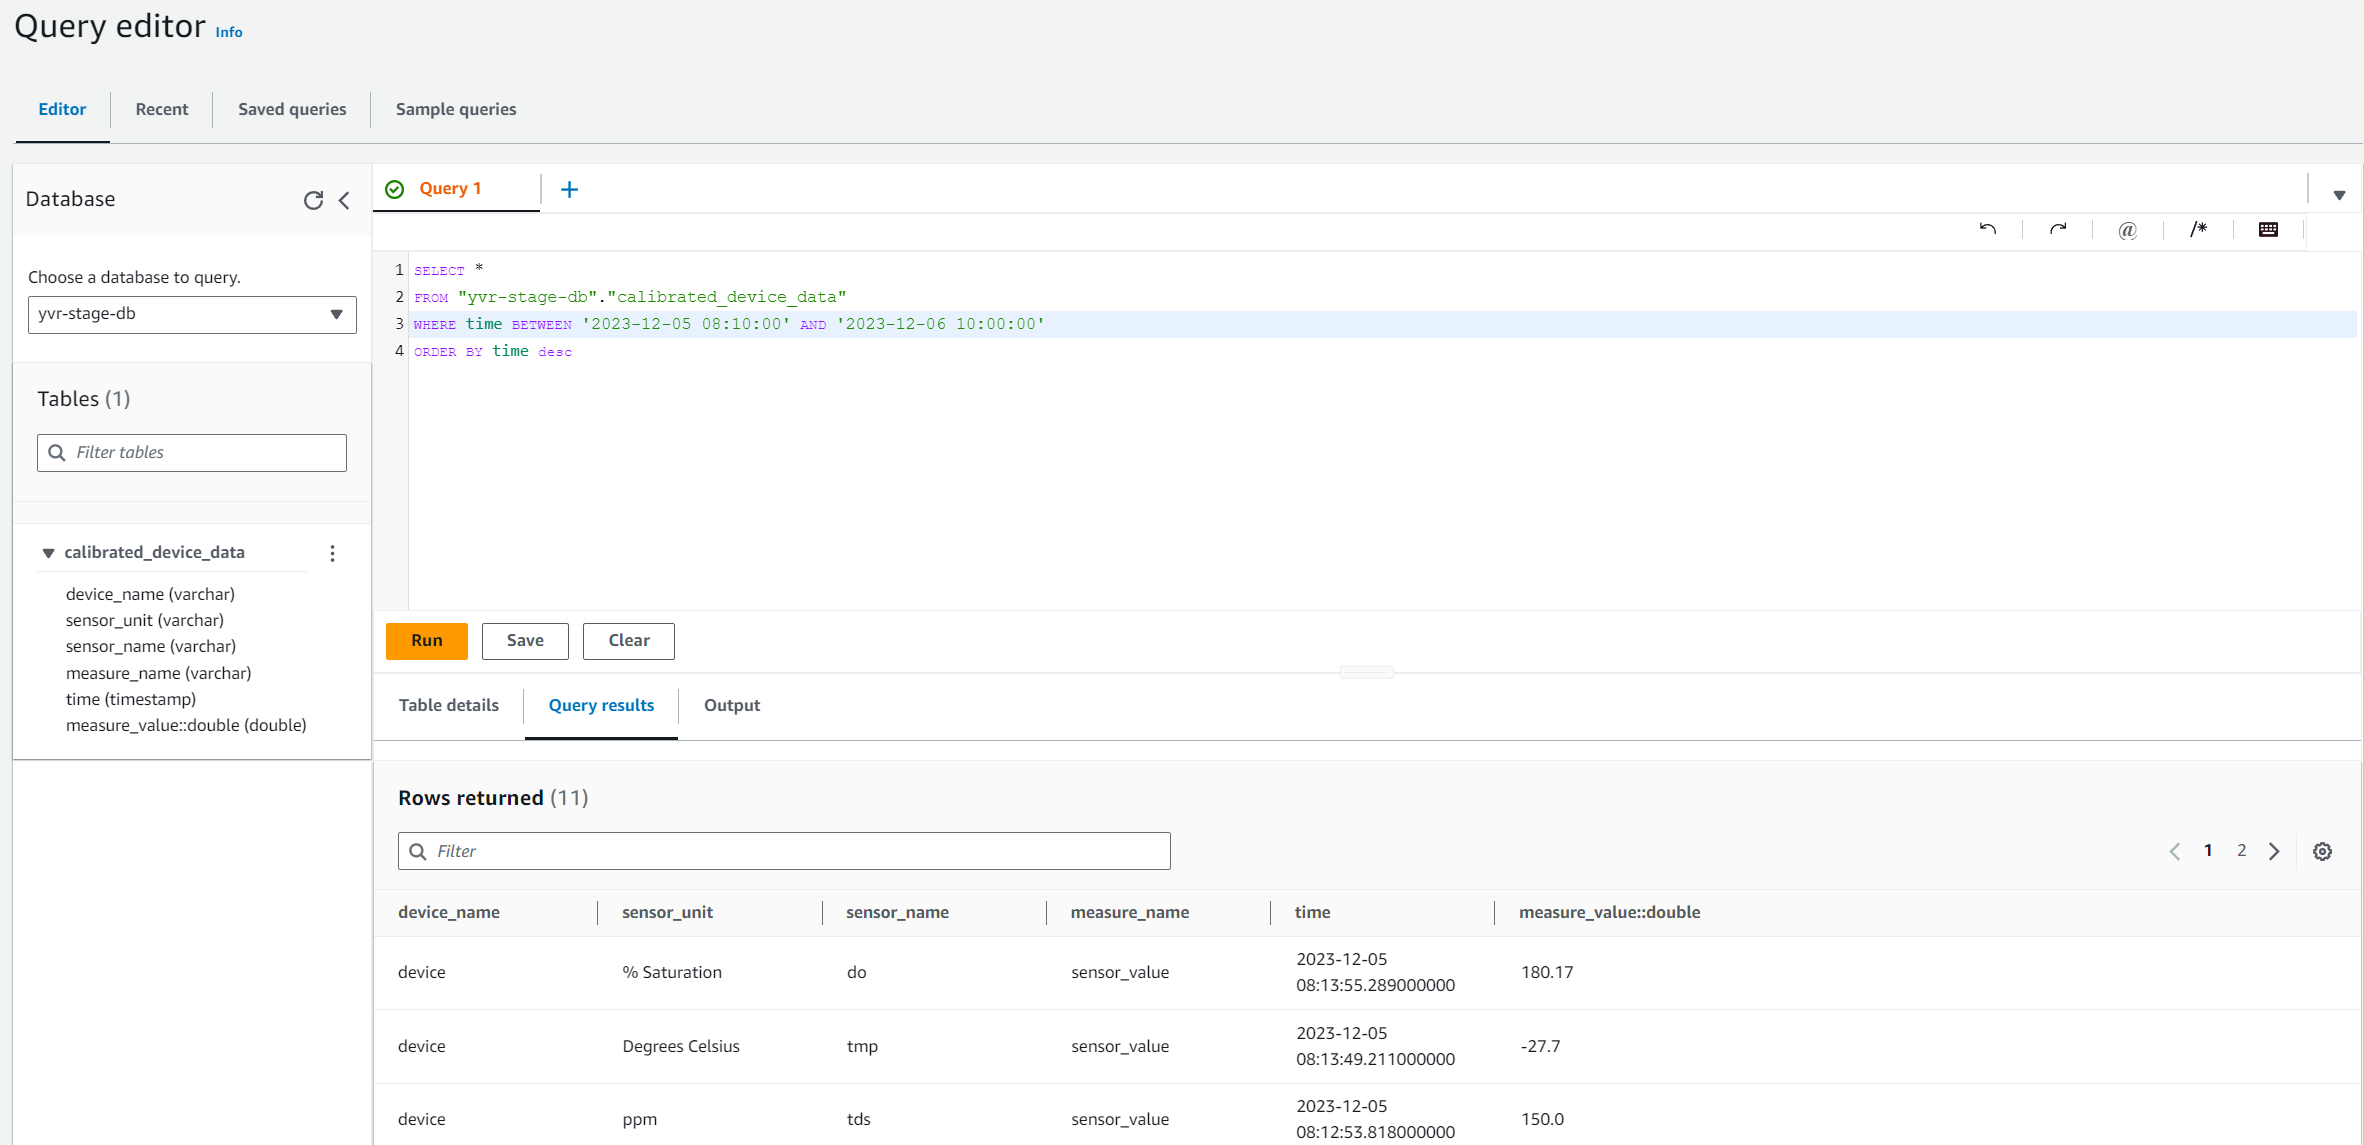
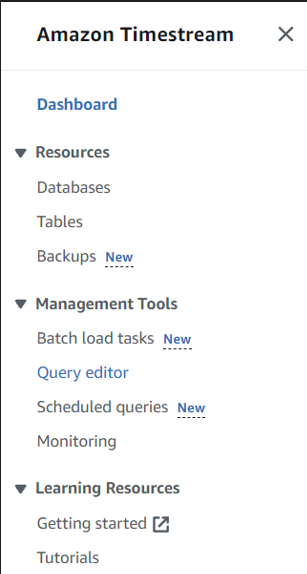
To ensure that the lambda function is functional correctly and send data to the timestream, we check the ‘Amazon TimeStream service’. On left hand side, enter Management Tools, the user can select ‘Query Editor’.
The user will be redirected to they query editor page. Choose ‘yvr-stage-db’ to query and there is only one table. In the query. Use the following query:
SELECT *
FROM "yvr-stage-db"."calibrated_device_data"
WHERE time BETWEEN '<YYYY>-<MM>-<DD> <HH>:<MM>:<SS>' AND '<YYYY>-<MM>-<DD> <HH>:<MM>:<SS>'
ORDER BY time desc
Below is the screenshot of the query editor in action: