Atlas Analog Dissolved Oxygen Sensor Calibration
A walkthrough of the Atlas Analog Dissolved Oxygen Sensor calibration procedure.
Materials
1x Arduino Zero 1x Laptop 1x USB to micro-USB cable 3x M-F Jumper Wires 1x Arduino Micro Jumper 1x Bottle of Atlas Science Electrolyte Solution 1x Bowl of Tap Water
Calibration Procedure
-
Grab the Arduino Zero that’s being deployed in the field
-
Attach the micro jumper to the debugger chip enable wires
-
If the dissolved oxygen sensor has not been serviced in over a month, replace / fill the Electrolyte solution in the sensor membrane
-
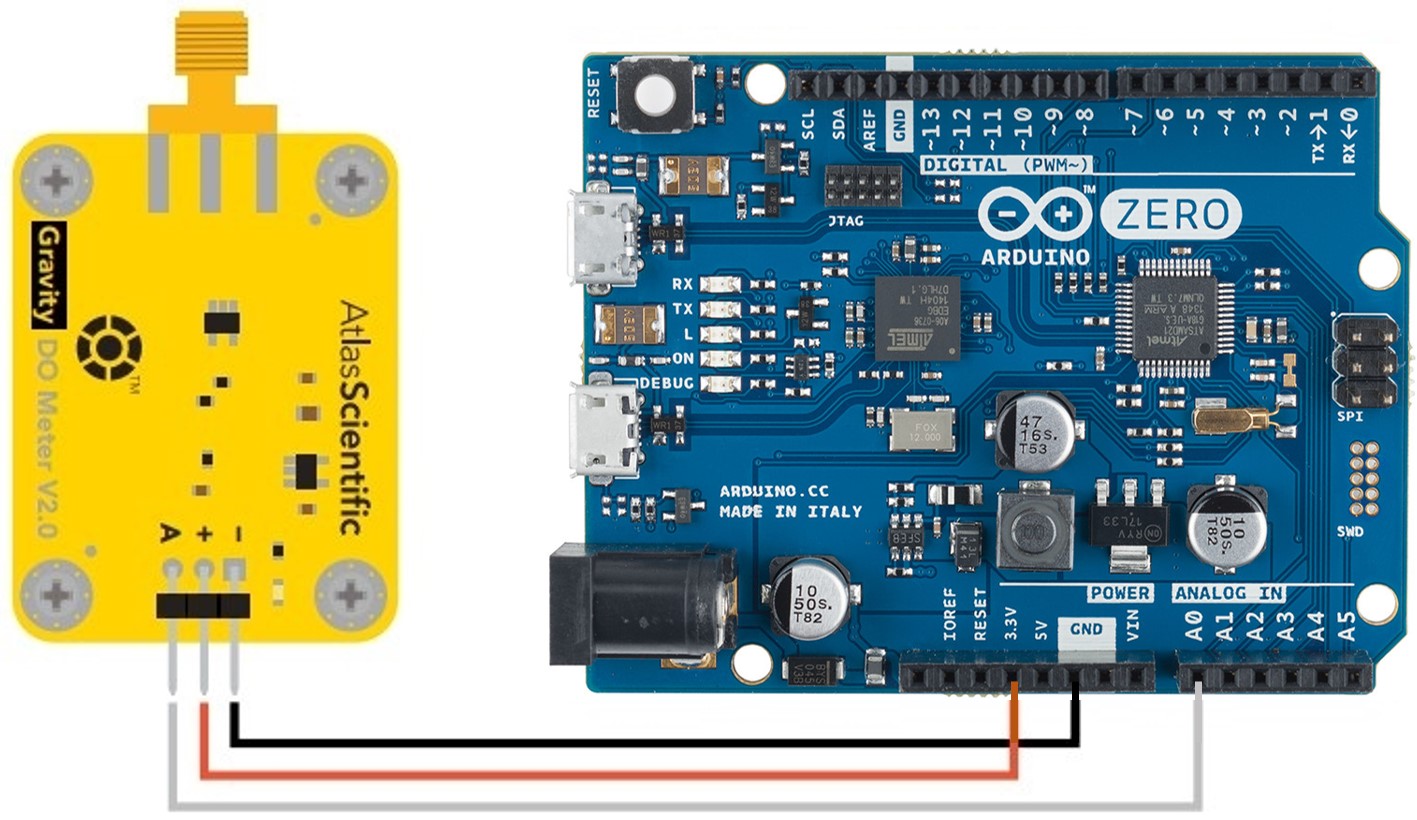
Wire the dissolved oxygen sensor to the Arduino Zero board
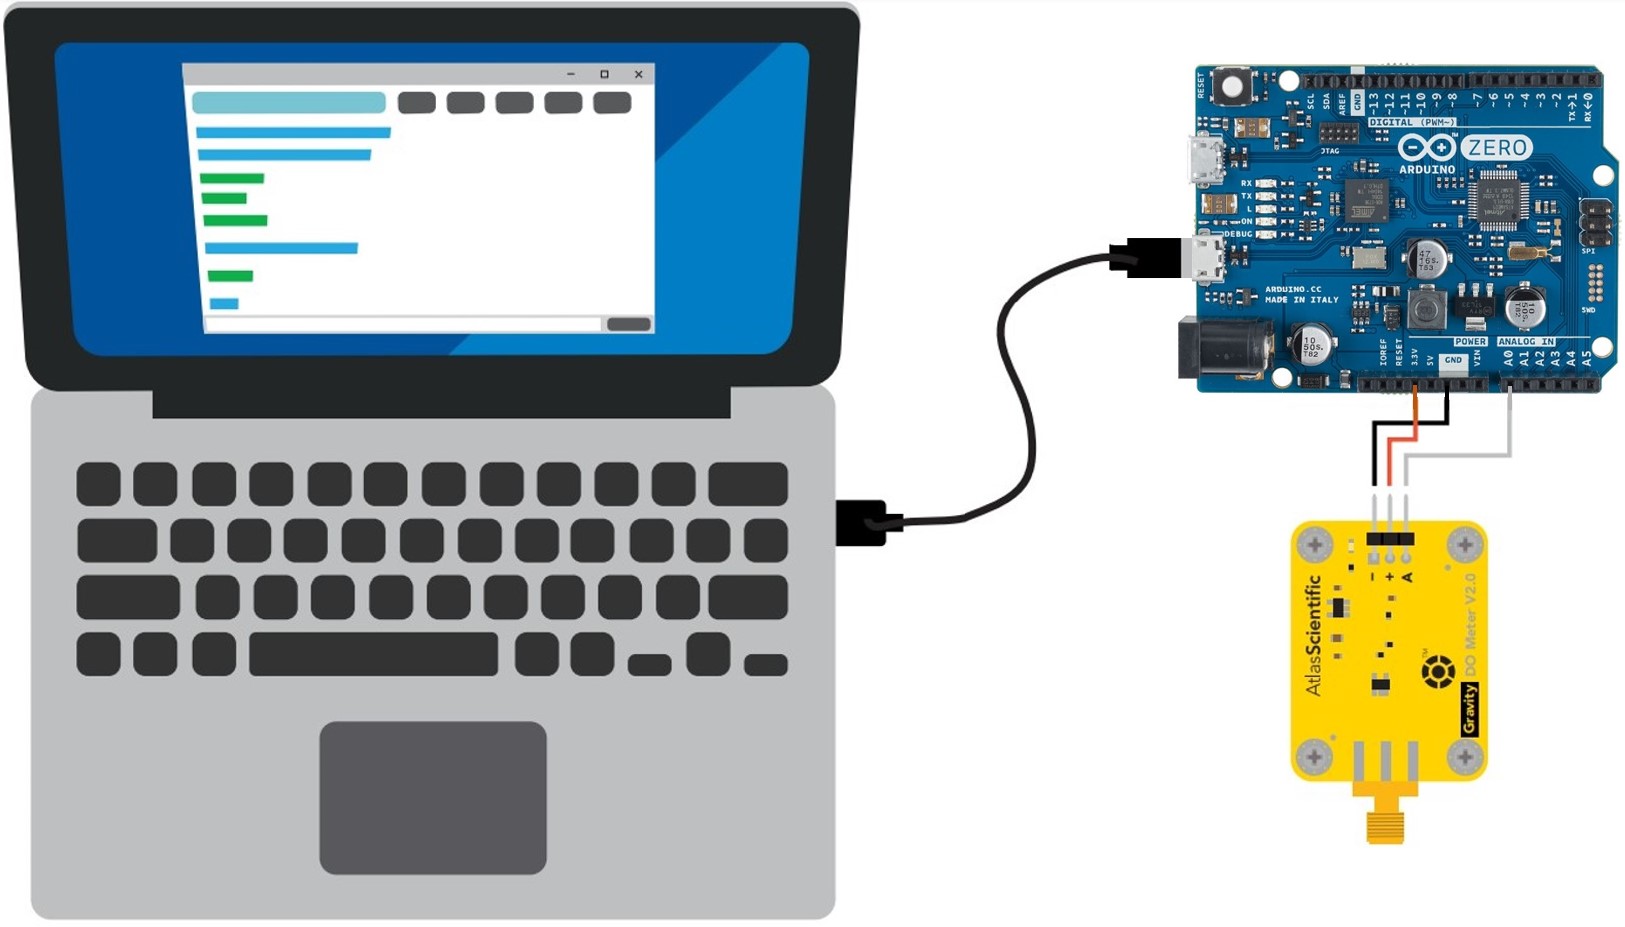
- Connect the laptop to the Arduino Zero using a USB - micro-USB cable.
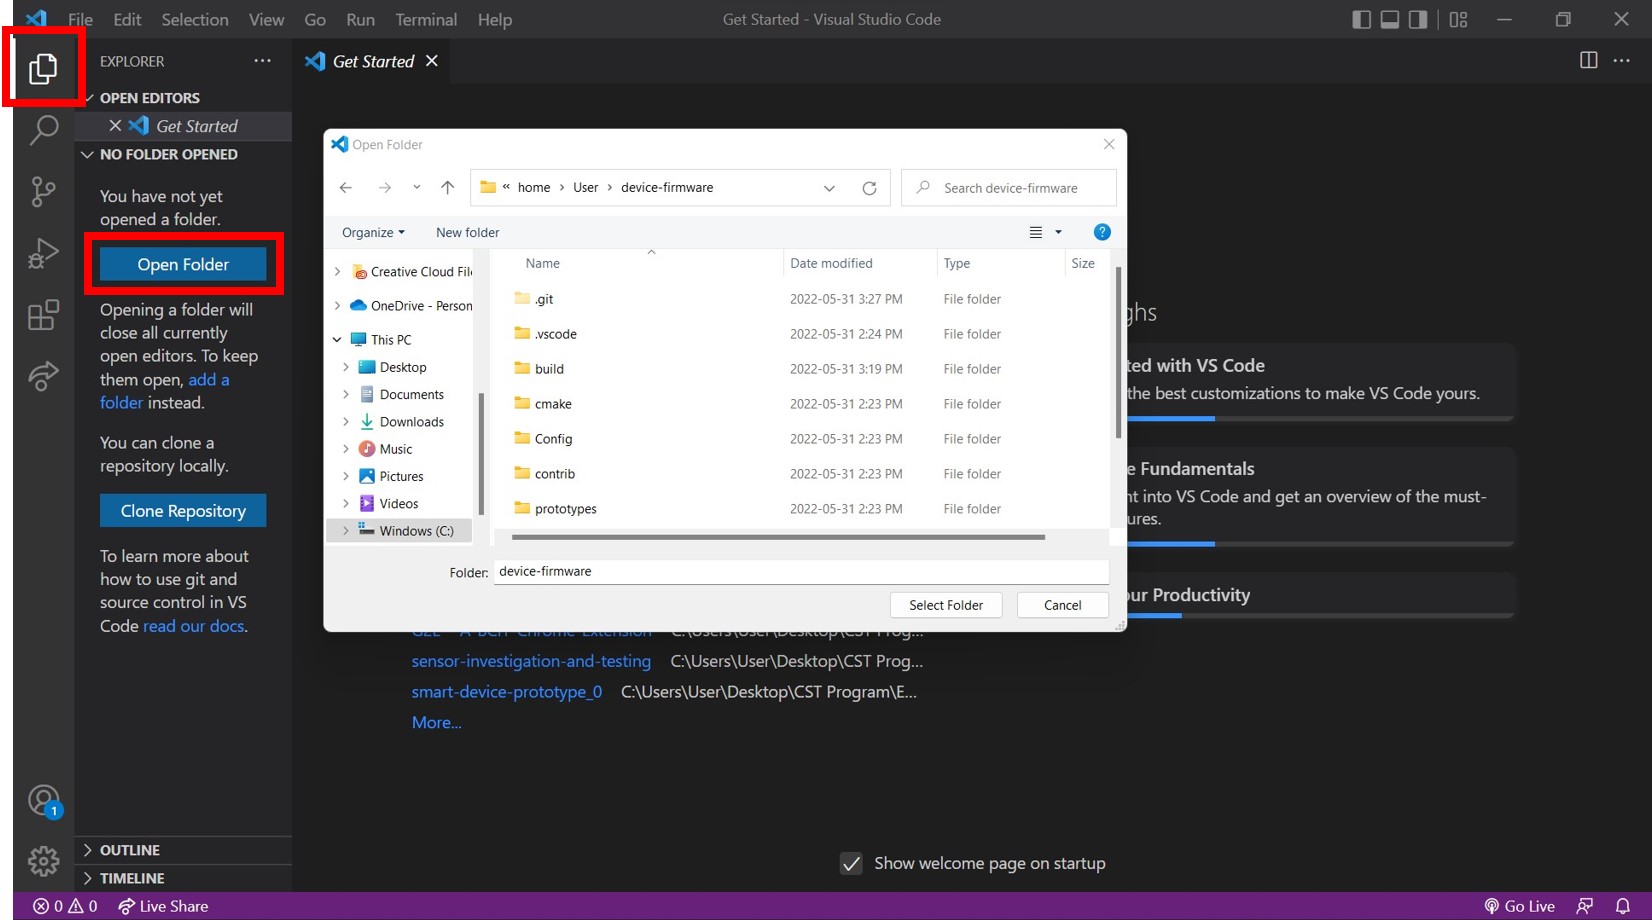
- Open the Visual Studio Code IDE
![]()
- Open the device-firmware project
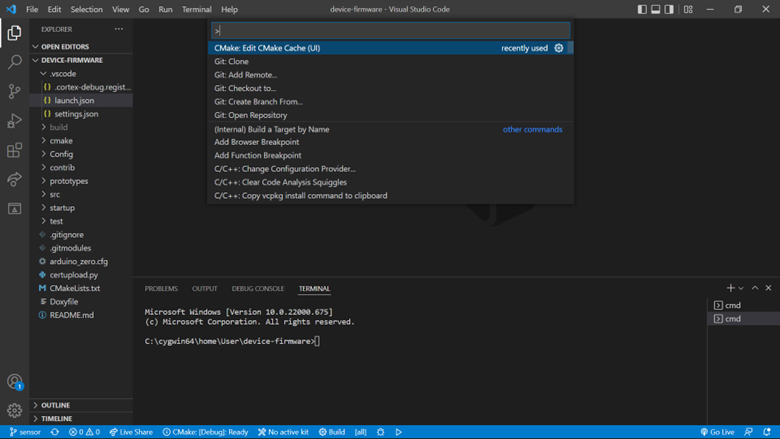
- Open the Command Palette
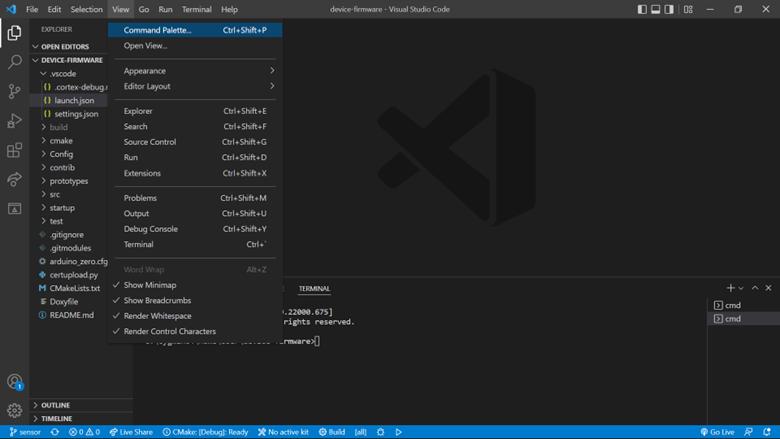
- Open the CMake Cache Editor by entering the command “CMake: Edit CMake Cahce (UI)” into the Command Palett
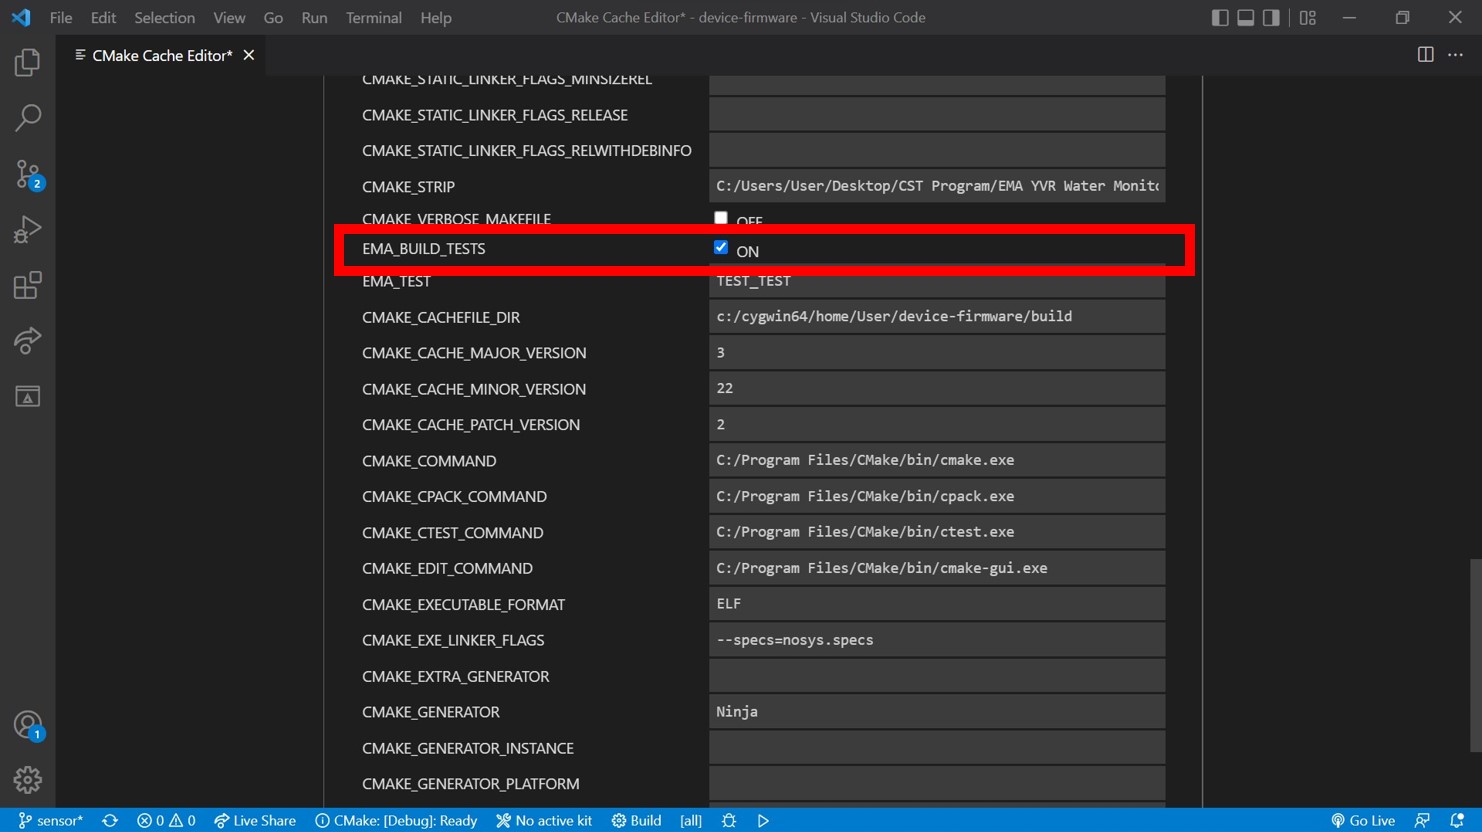
- Check the EMA_BUILD_TESTS to ON, to set the program to run the test tasks
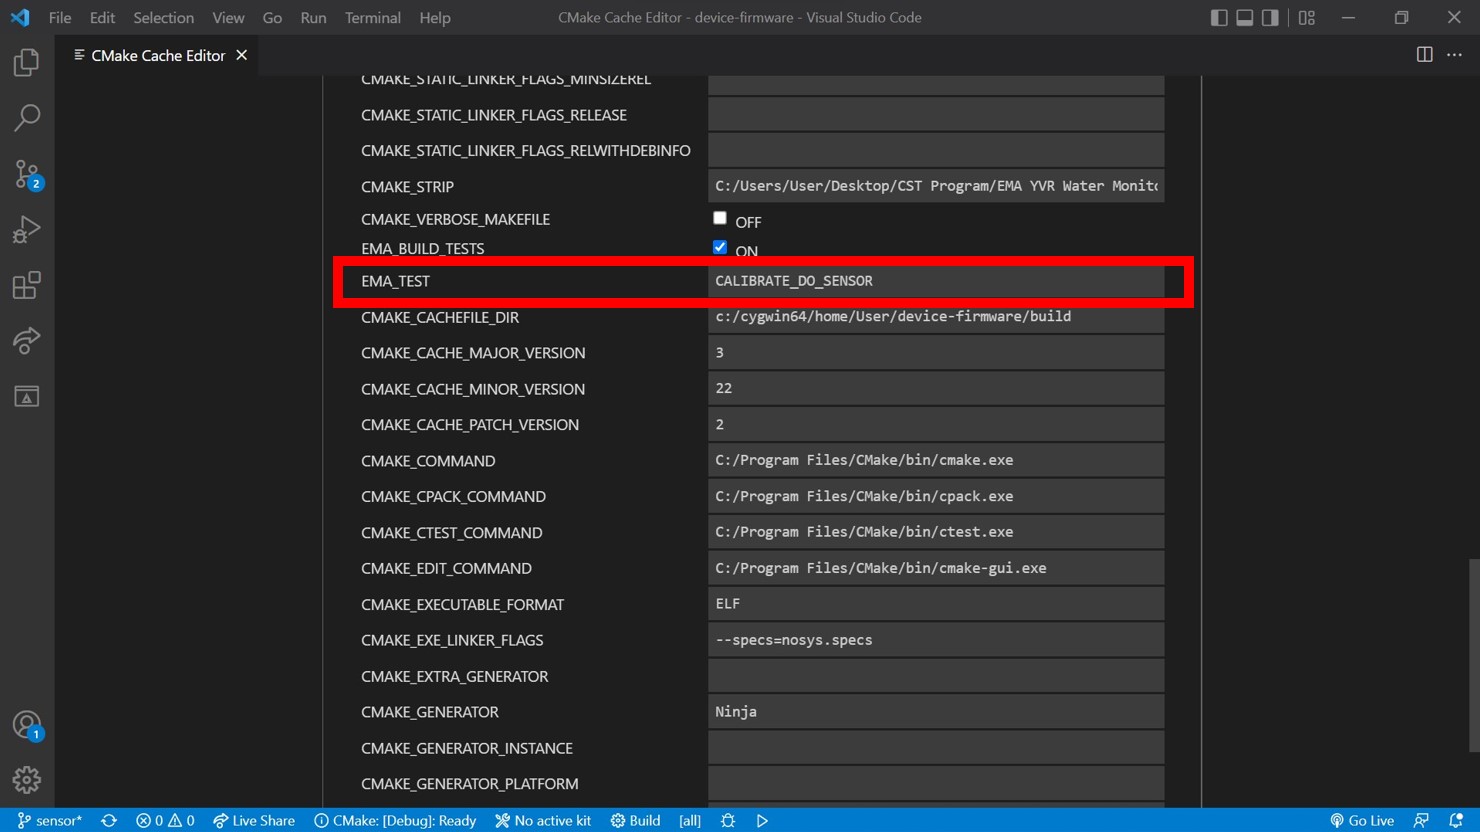
- Enter CALIBRATE_DO_SENSOR into the EMA_TEST field to set the conditional compilation for the ifdef CALIBRATE_DO_SENSOR task
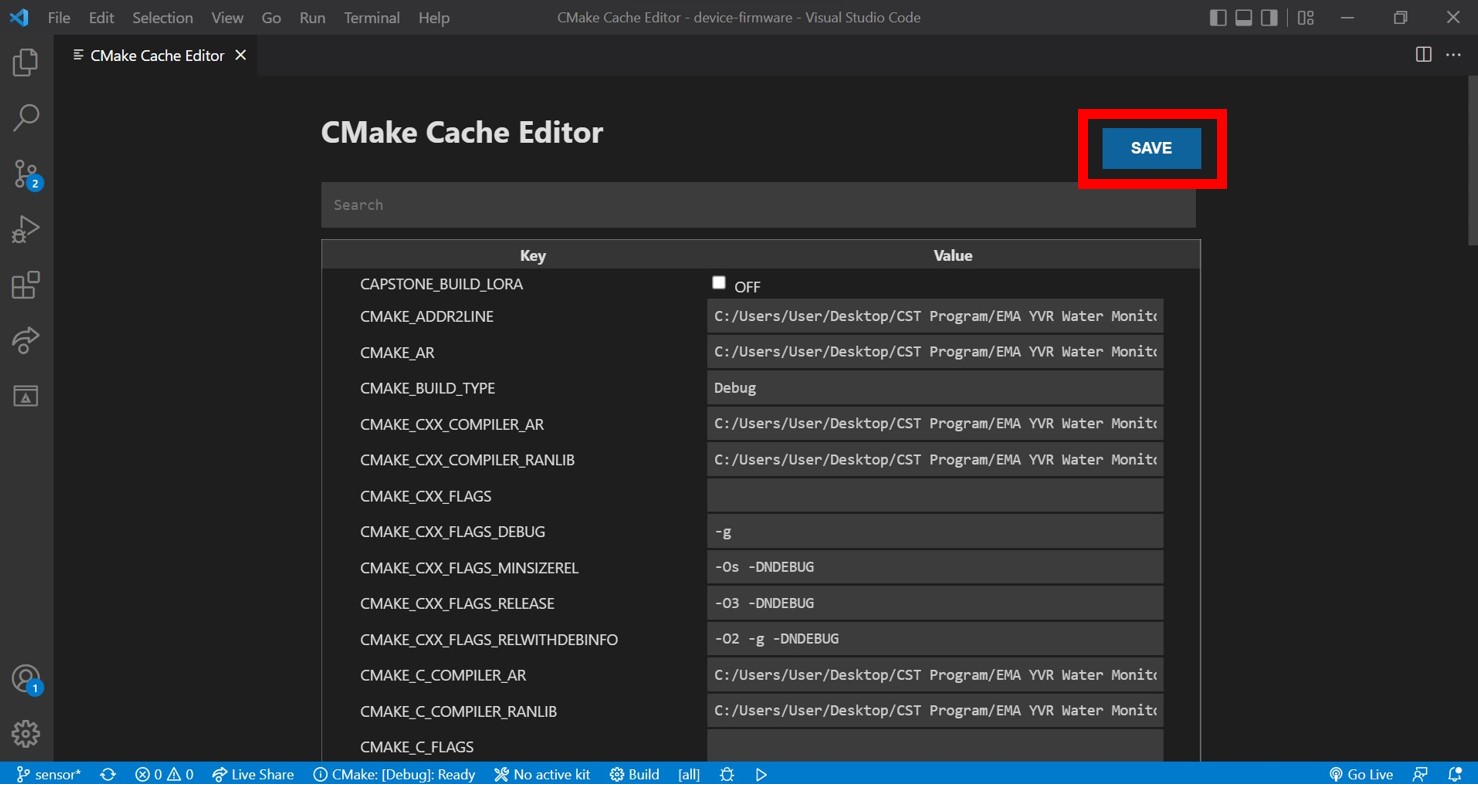
- Click the Save button to save the updates to the CMake Cache Editor
-
Press “F7” to flash the device with the new code
-
Run the program in debug mode
-
Add a debug point to the vtask delay after the sensor measure command
-
Verify that measurements are being received
-
If successfully receiving measurements, continue, else check the sensor wiring
-
Dip the probe into water
-
Remove the probe from the water and twirl it around in the air
-
Twirl the probe for a few minutes and start debugging the program
-
Once the sensor measurements have stabilized, record the millivoltage of the measurement
-
Edit the calibration variable to successfully calibrate the sensor
-
Repeat steps 14 - 16
-
If successfully calibrated the sensor should show the dissolved oxygen percentage of around 100%